Cold DropMercenary company field manual
You command a mercenary company in the Inner Sphere of 3025. You take contracts, plan each drop, then watch your lance fight it out on a real hex map under classic BattleTech rules. Between fights you keep the company alive: money, repairs, pilots, salvage and the goodwill of the Great Houses. Every company is one run. What you salvage stays unlocked for the next one.
The idea in one minute
- A company is a run. It ends when the Commander dies, when the treasury sinks below −277,500 C-bills, when you have no 'Mechs left and under 1.2 million C-bills, or when you choose to retire, which you can do once you have grown your net worth by 50 million.
- You plan, then you watch. Before each battle you pick the lance, their roles, the focus-fire order and when to pull out. Then the fight plays itself, and you can only sound the retreat.
- The rules are tabletop BattleTech, lightly trimmed: real 'Mech designs, real weapon ranges, heat, armour by hit location, facing and rear shots, critical hits, ammo explosions.
- Salvage is the long game. Recover an enemy 'Mech and its design unlocks into your Collection for good. Later companies can buy it.
- Time is money. Travel takes days, and every 30 days the company pays upkeep.
New to BattleTech?
It is the year 3025. Humanity has spread across hundreds of worlds, and five Great Houses fight over them in an endless war. The Inner Sphere is the region they rule. Their armies hire mercenaries to fill the gaps, and you run one of those mercenary companies.
Wars are fought with BattleMechs ('Mechs for short): walking war machines 6 to 12 metres tall, each driven by one pilot (a MechWarrior). A 'Mech weighs 20 to 100 tons. Light 'Mechs are fast and fragile; assault 'Mechs are slow and devastating. Four 'Mechs fighting together make a lance.
Words you'll see everywhere
| C-bills | money (ComStar bills) |
| House | one of the five Great Houses: Davion (Federated Suns), Steiner (Lyran Commonwealth), Kurita (Draconis Combine), Liao (Capellan Confederation), Marik (Free Worlds League). ComStar runs the interstellar mail and stays "neutral". |
| DropShip | the ship that carries your 'Mechs between a world's orbit and the ground. Yours is a Leopard, and it's your base. |
| Jump | a hop between star systems by JumpShip, up to 30 light years |
| Hex | one cell of the battle map, 30 metres across |
| MP | movement points: how many hexes a 'Mech can walk, run or jump in a turn |
| Gunnery / Piloting | a pilot's skill at shooting and at keeping the 'Mech upright. Lower is better: 4 / 5 is an average rookie, 2 / 3 is a veteran. |
| BV | battle value: one number for how strong a unit is. Compare your lance's BV with the enemy's to judge a fight. |
| Heat | every 'Mech builds heat when it moves and fires. Too much heat slows it, spoils its aim, and can shut it down or set off its ammo. |
| Armour / Structure | armour is the outer plating; structure is the skeleton under it. Damage strips armour first. Damage to structure breaks parts. |
| Salvage | wrecks left on the battlefield. Your contract says how much you may keep. |
Your first contract, step by step
- Found a company. Main menu › NEW COMPANY. Keep the defaults and press FOUND COMPANY. You arrive aboard your DropShip with four 'Mechs and four pilots.
- Look at the bottom bar. It names your next job. With no contract, that's "Find a contract".
- Open the Bridge (key 1) and its CONTRACTS tab. Pick an offer with a low difficulty (one or two diamonds). Read the pay, the salvage rights and the deadline.
- Sign. On your current world the button reads SIGN CONTRACT →. On another world it reads SIGN & SHIP OUT · n DAYS: signing also flies you there, and the trip's days and passage are already counted in the offer.
- Check the drop. The bottom bar's chips turn green when your lance is fit, repaired and crewed. Click any red chip to fix it.
- BRIEF THE LANCE. Choose who drops, give each 'Mech a role, set when to retreat. Then DEPLOY.
- Watch the battle. Pause and scrub if you like. If it goes badly, flip SAFETY and SOUND THE RETREAT.
- Read the debrief. See what you earned and what broke. BACK ABOARD applies the result.
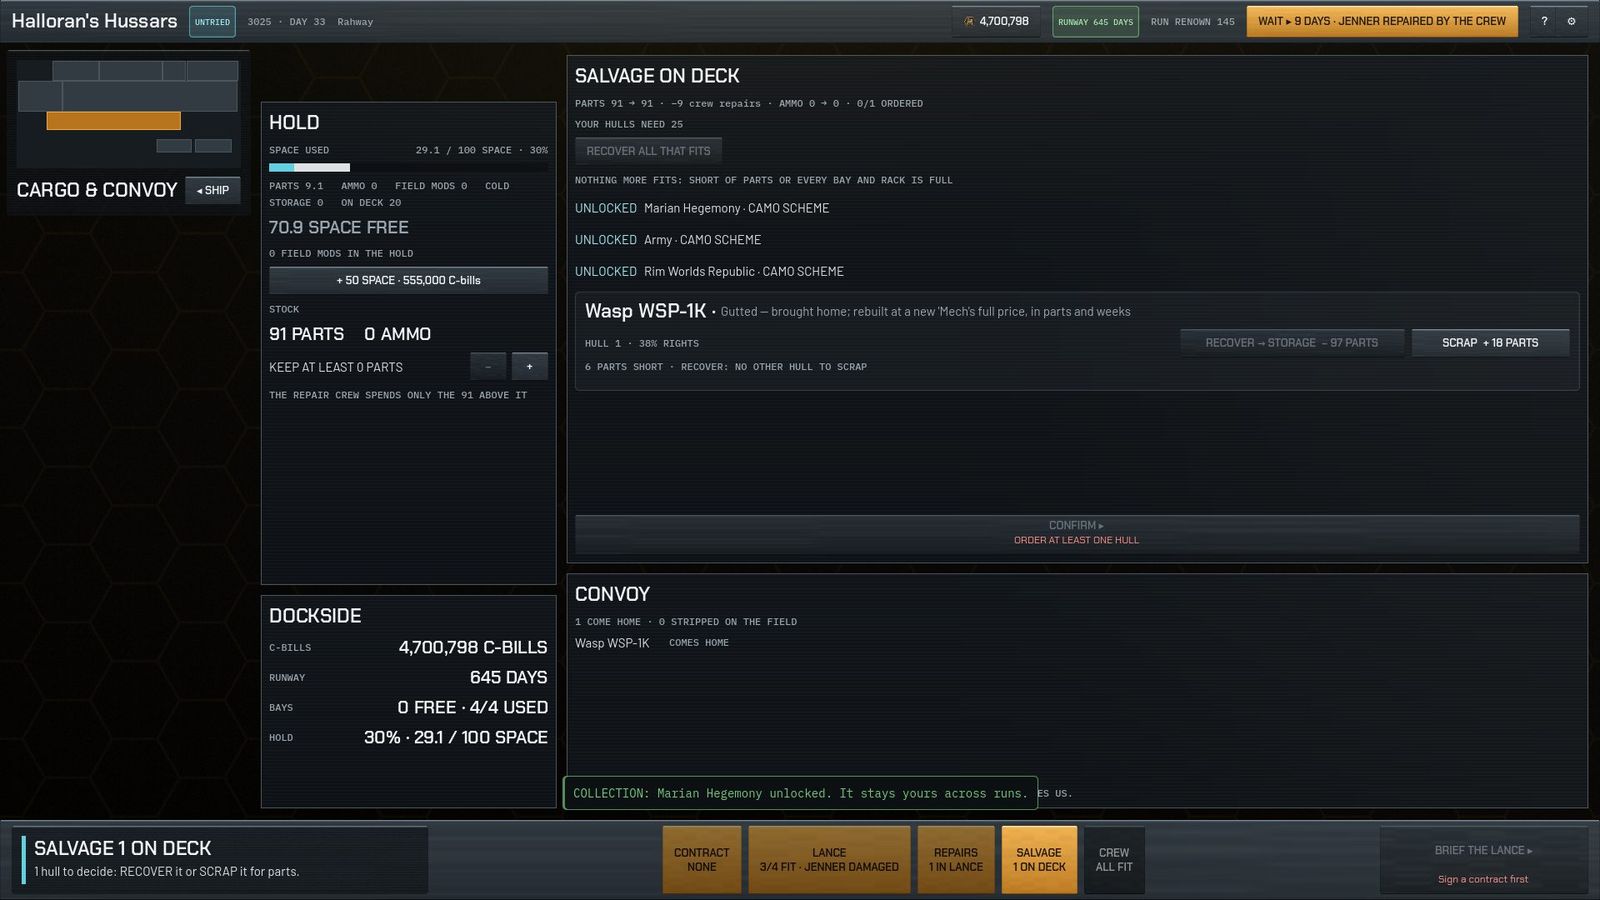
- Sort the salvage in Cargo & Convoy: recover the hulls you want, scrap the rest for parts.
- Repair in the Mech Bay, hire if someone was hurt, and pick the next contract. Every 30 days upkeep is due, so keep an eye on the runway in the top bar.
How it all connects
The orange loop is one contract. The dashed teal lines carry over between runs.
| This | feeds | which means |
|---|---|---|
| Contract pay | C-bills | covers the monthly upkeep, repairs and hiring |
| C-bills ÷ upkeep | Runway | days until the money runs out; the top bar shows it |
| Win or loss | Standing | a win is +5 with the employer, +2 per difficulty level; a loss is −3 |
| Standing | Contract terms | higher salvage cap, bigger advance, cheaper intel; at Hostile a House stops hiring you |
| Battles won | Company rank | unlocks harder, better-paid contracts and multi-battle operations |
| Claimed wrecks | Your bay, or spare parts | a recovered hull unlocks its design in the Collection |
| Kills, wins, contracts | Renown | banked when the run ends; spend it on designs, field mods and Commander perks |
Founding your company
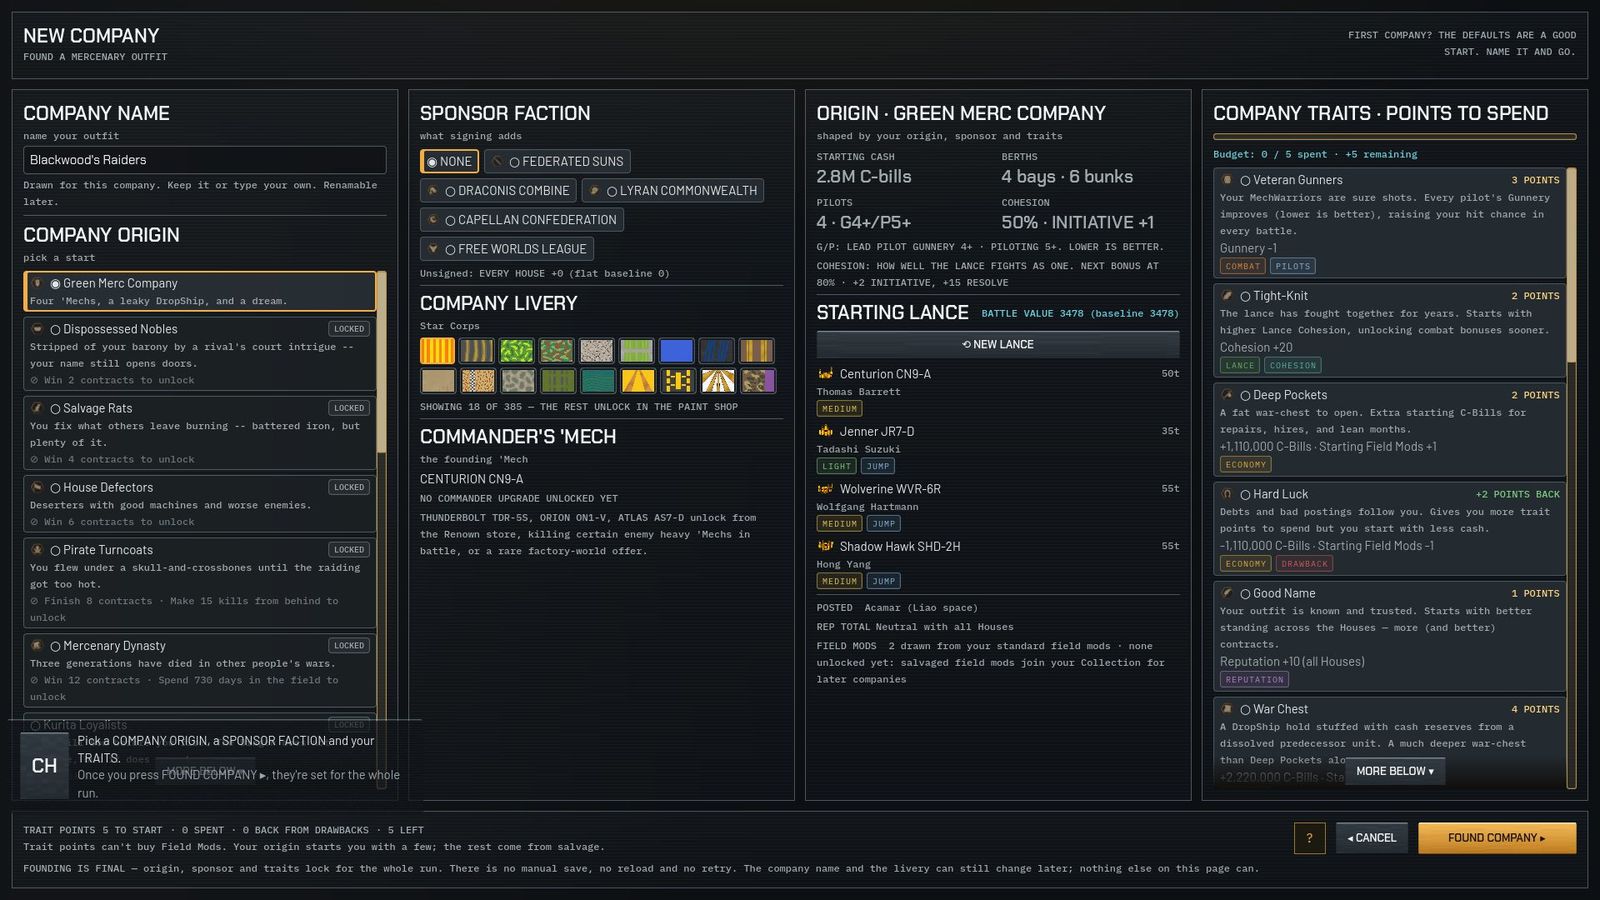
- Name and livery. Leave the name blank and the game picks one.
- Origin. It sets your Commander's 'Mech, the 'Mechs you can start with and your starting cash. Only Green Merc Company is open at first; 17 more unlock through play (contracts won, kills, days survived, standing with a House).
- Sponsor. Optional: +20 standing with one House, a little less with its rivals.
- Traits. 5 points to spend. Better gunners, tighter cohesion, a war chest; drawbacks like Green Recruits or Hard Luck give points back. Traits never touch the Commander.
| You start with | |
|---|---|
| C-bills | 2,774,000 |
| Lance | Centurion CN9-A, Jenner JR7-D, Wolverine WVR-6R, Shadow Hawk SHD-2H |
| Pilots | 4, each Gunnery 4 / Piloting 5 (lower is better) |
| Ship | 4 'Mech bays, 4 cold-storage racks, 6 bunks, 100 hold space, 1 astech |
| Supplies | 100 spare parts, 5 influence |
Your DropShip
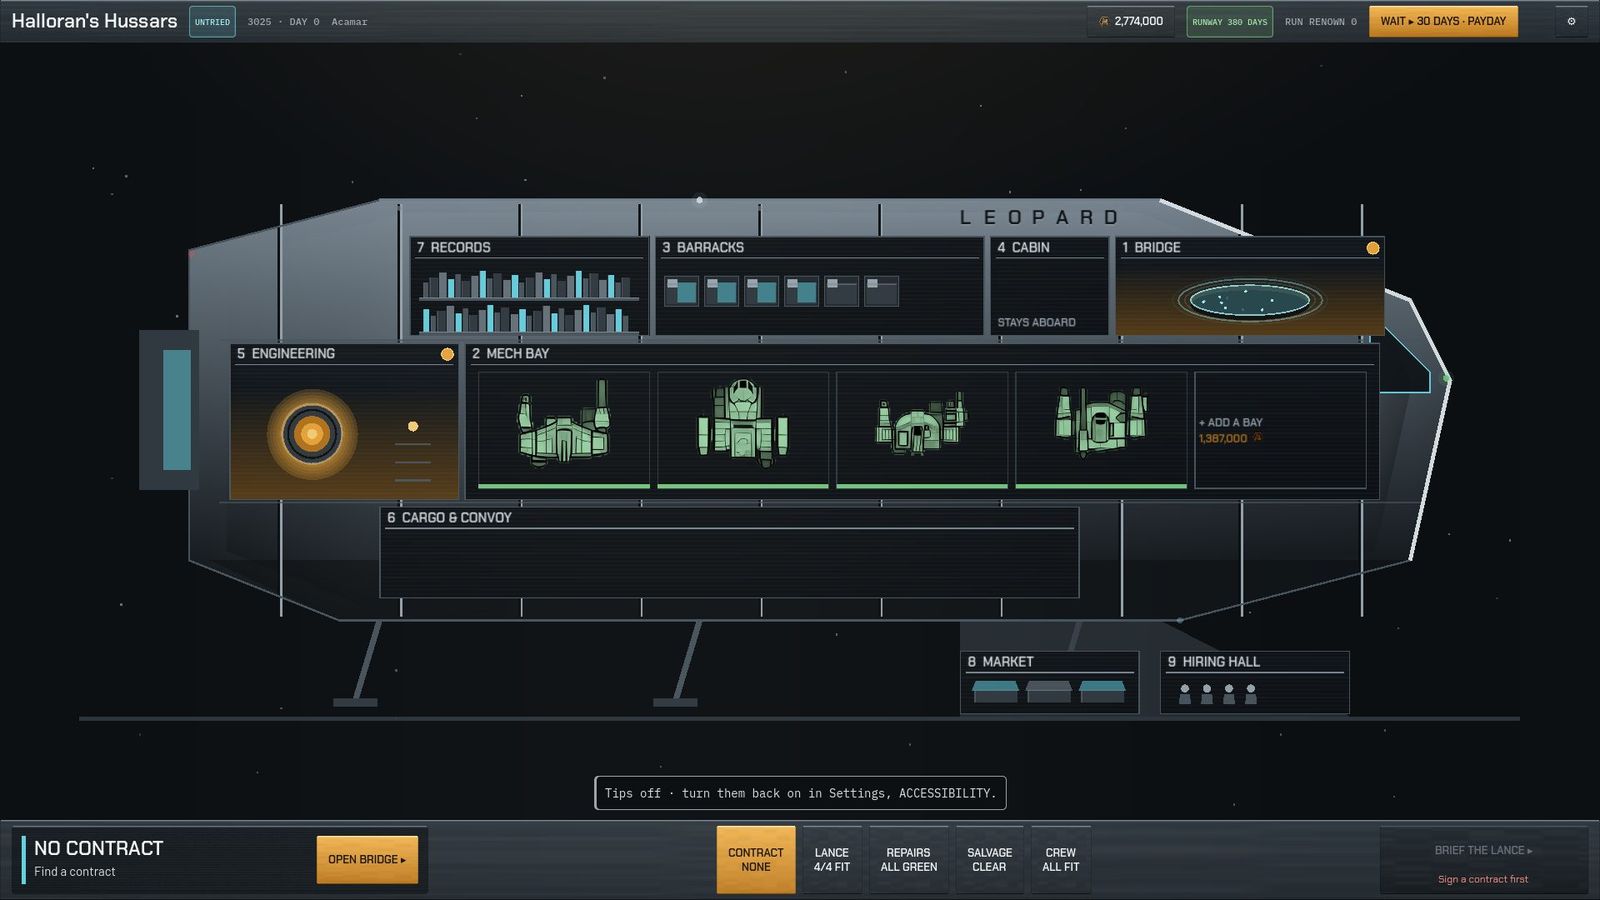
The hub shows the ship as a cutaway. Click a room or press its number.
1Bridge
Star map, the current system, travel, contracts, operations.
2Mech Bay
Your 'Mechs: armour, weapons, ammo, field mods, repairs, paint.
3Barracks
Pilots: skills, XP, perks, injuries, who sits in which 'Mech.
4Cabin
The Commander: level, perks, stay aboard or drop.
5Engineering
Tech crew, repair queue, ship upgrades (bays, hold, bunks).
6Cargo & Convoy
The hold and salvage on deck: recover or scrap.
7Records
Chronicle, ledger, Collection, codex, dossiers.
8Market
Buy and sell 'Mechs, ammo, parts. In port only.
9Hiring Hall
Recruit pilots and astechs. In port only.
The top bar

The bottom bar

Money
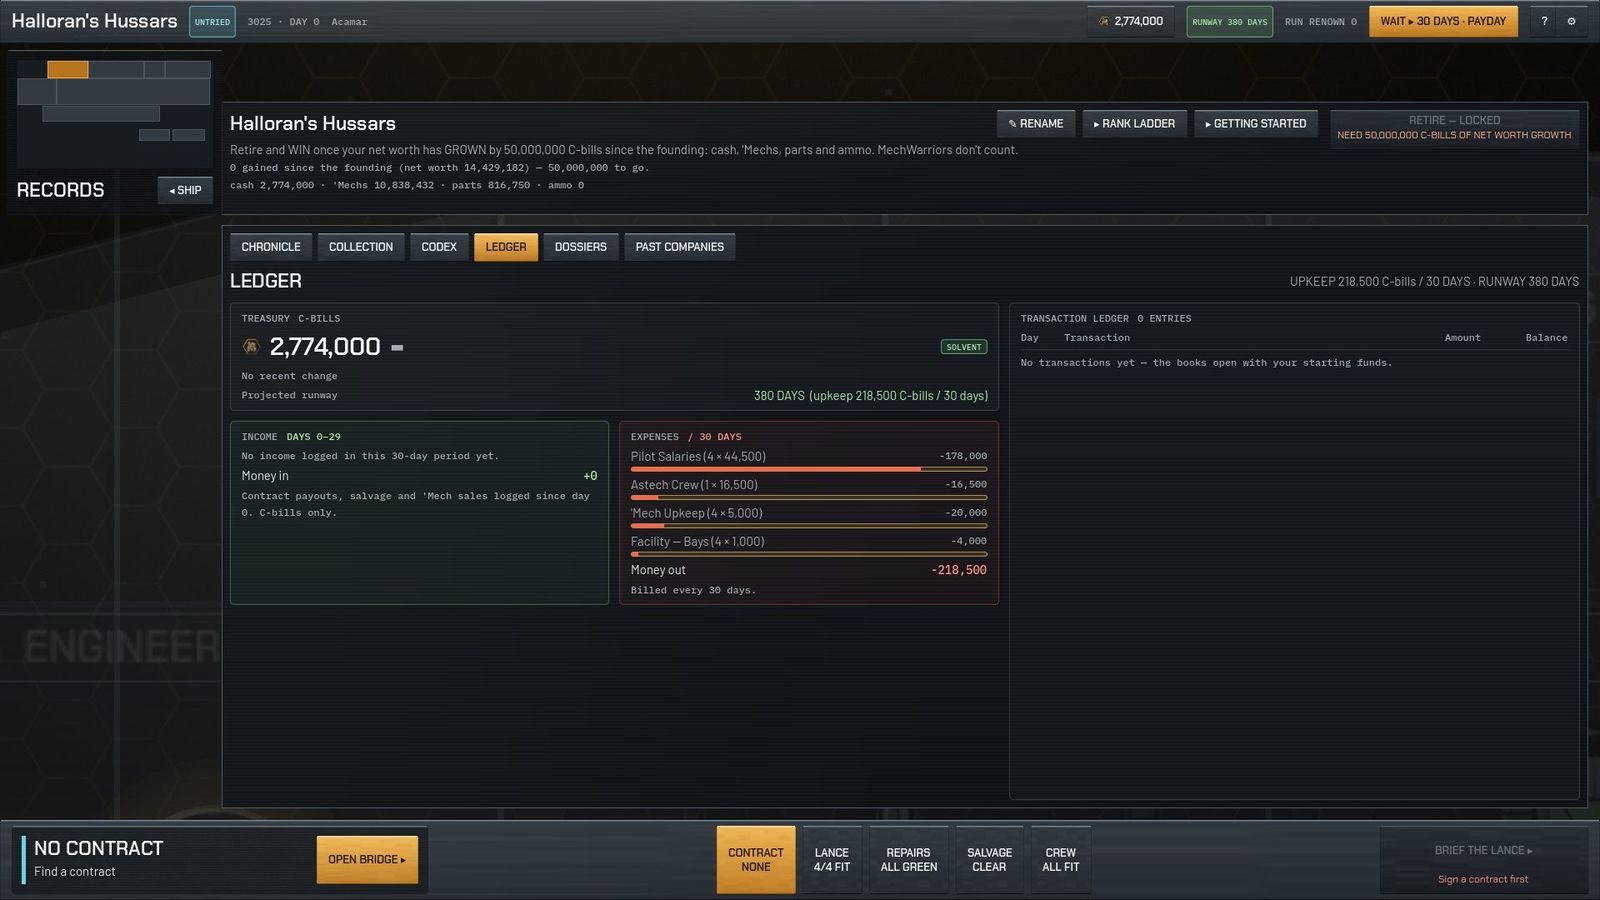
- Upkeep every 30 days: 44,500 per pilot, 16,500 per astech (each extra one costs 25% more), 5,000 per 'Mech you own, 1,000 per bay. A starting company pays about 218,500 a month.
- Runway is how many days your C-bills last at that rate. It turns amber, then red, as it shrinks.
- WAIT ▸ passes time (for repairs, a hiring refresh or payday). It shows your money and parts after the wait before you confirm.
- Can't make payday? The non-wage bills still come out, and pilots go unpaid. Each missed payday costs 10 cohesion. After 30 days unpaid, pilots fight worse. After 60, they may leave.
- Bankrupt at −277,500 C-bills: the run ends.
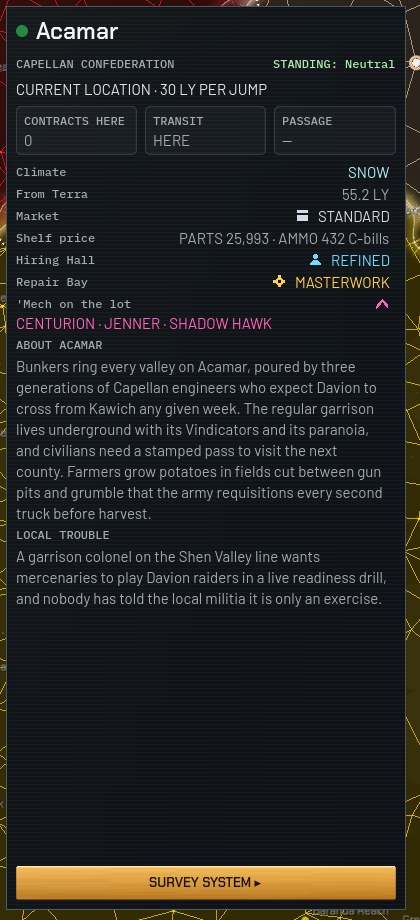
The star map
Lenses
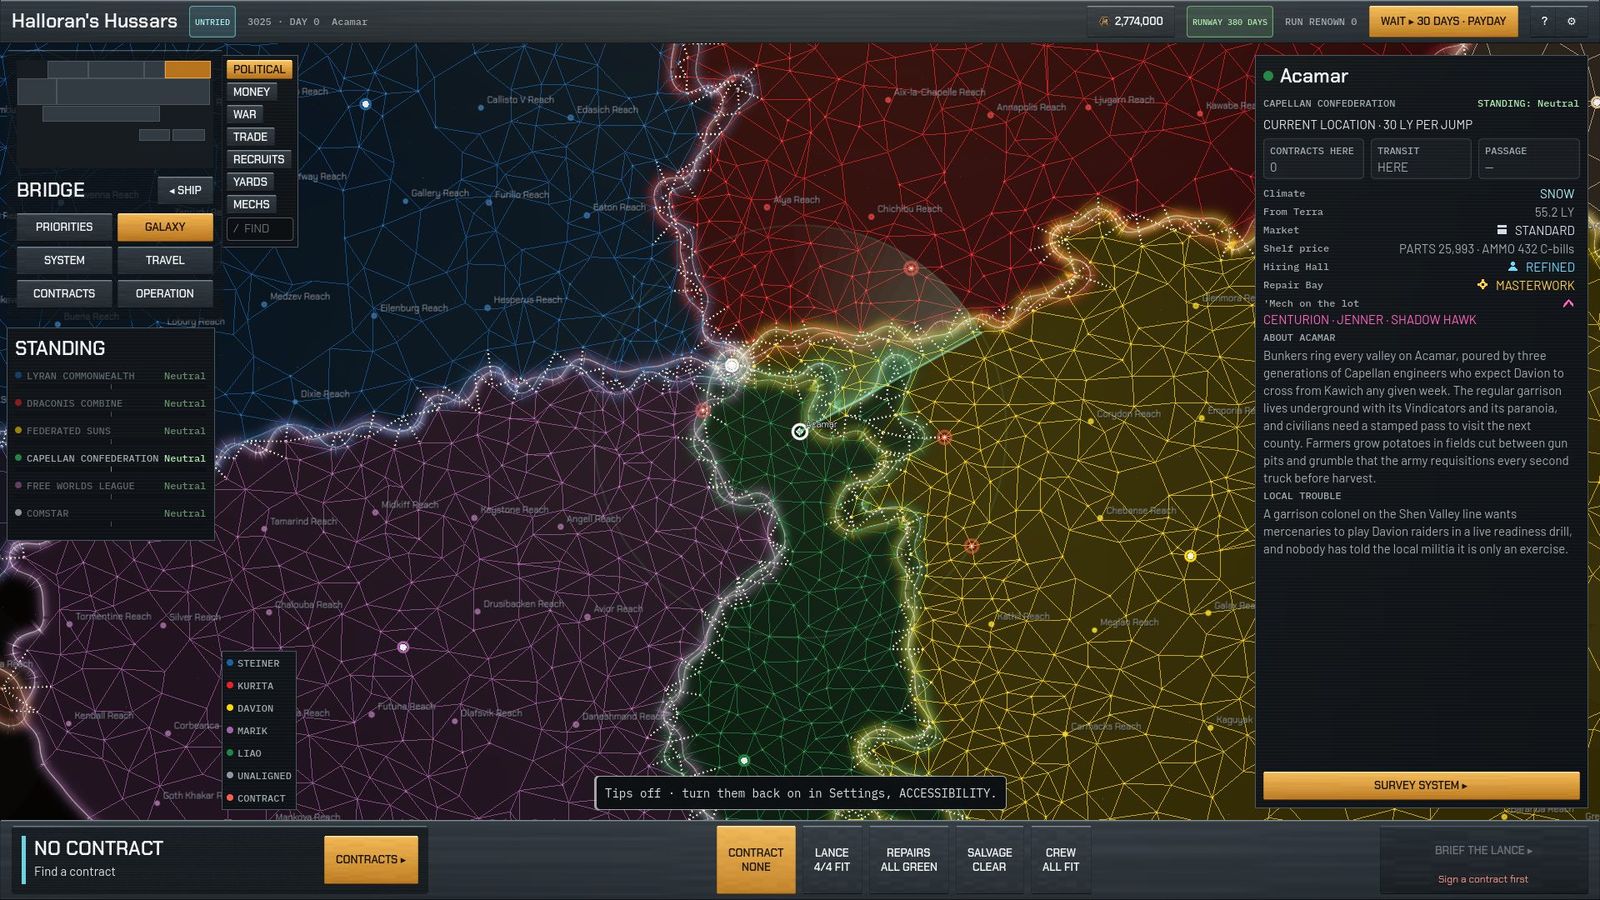
Each lens repaints the map to answer one question. Press L to step through them.
| POLITICAL | who owns what |
| MONEY | where the best contract pays most after the trip |
| WAR | live fronts |
| TRADE | cheap parts (10% off or better) |
| RECRUITS | good hiring halls |
| YARDS | repair bays |
| MECHS | lots selling 3+ of your unlocked designs |
/ searches for a world, or for a world selling a 'Mech you want. News scrolls along the bottom of the map; click an item to jump to its world.
Travel
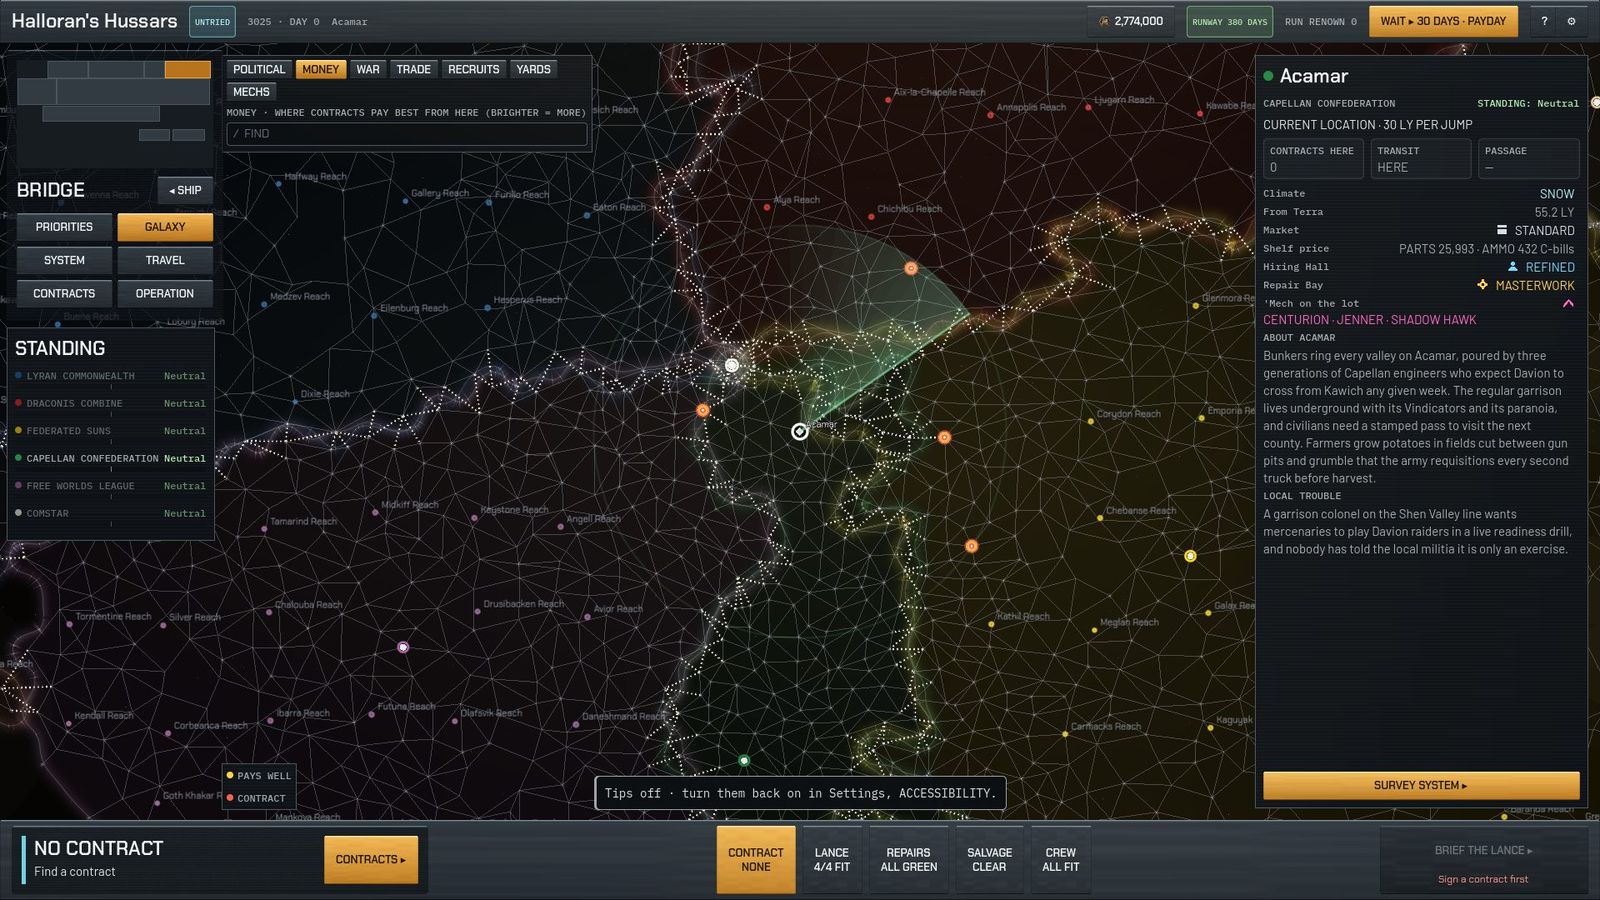
- A jump covers up to 30 light years and takes 7 days. Passage is 83,000 C-bills a jump plus a toll at busy worlds. There is no fuel to manage.
- While a contract is signed you travel to its target, not wherever you like.
- The Travel tab shows TREASURY ON ARRIVAL, after passage and any upkeep due on the way.
Contracts
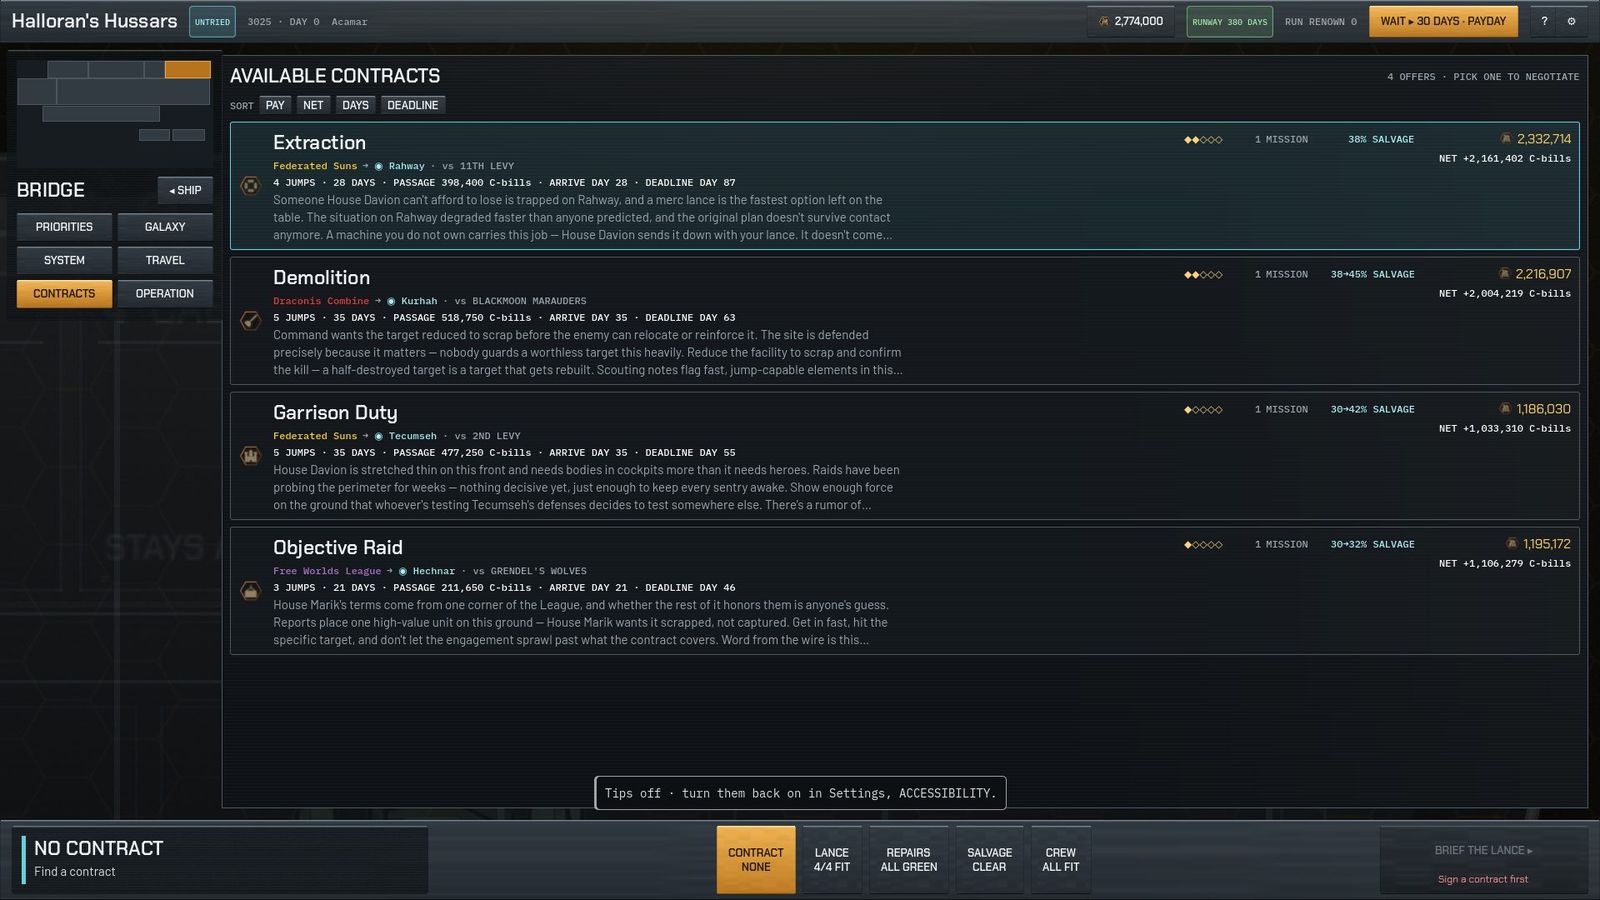
- Eight mission types: Planetary Assault, Objective Raid and Demolition when you attack; Border Defense, Garrison Duty, Recon in Force, Extraction and Pirate Hunt when you defend.
- Difficulty 1-5 sets the pay and the enemy. Your company rank caps how hard an offer can be.
- Salvage rights (a percentage) decide how much of the battlefield you may claim. They start around 30% and rise with difficulty.
- Negotiate before signing: trade pay for salvage, ask for an advance, or buy intel (the map, the enemy force, a reinforcement warning).
- Operations are chains of 2-6 fights on one contract. They open once your company is BLOODED.
The brief: making the plan
After you sign a contract, BRIEF THE LANCE ▸ opens this screen. It is the only place you give orders. Once you press DEPLOY, your pilots fight on their own using the plan you set here, so take a minute over it.
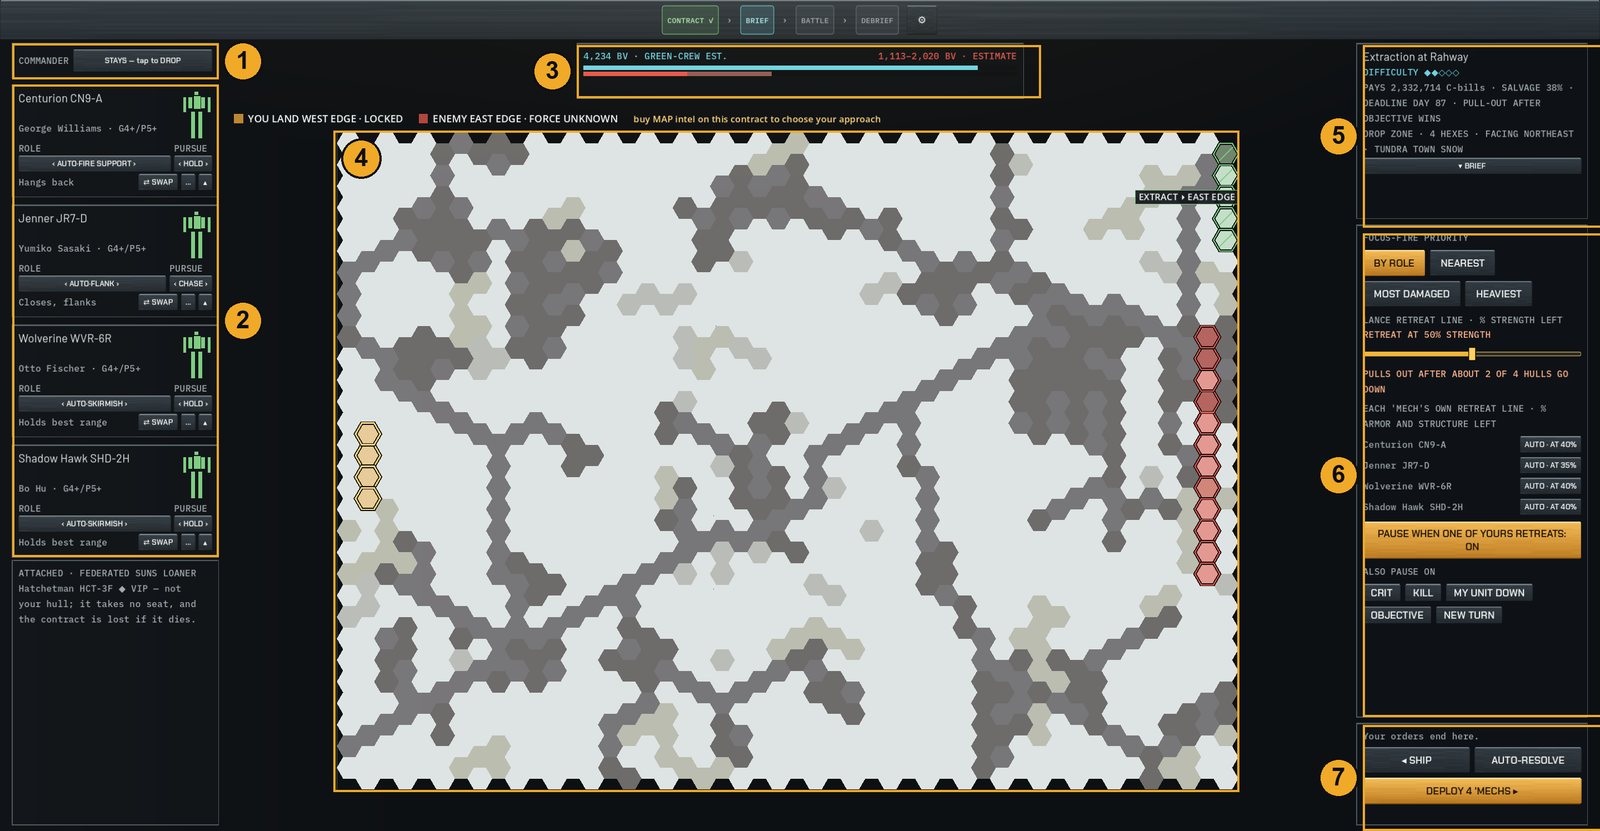
| 1 Commander | Whether your Commander stays on the DropShip or drops into battle. Tap to switch. |
| 2 Lance cards | One card per 'Mech that drops: chassis, pilot and skills, its role and pursue orders. |
| 3 Odds bar | Your lance's battle value (BV) against the estimate for the enemy. A longer bar is stronger. |
| 4 Drop map | The battlefield. Amber hexes: where you land. Red: where the enemy starts. Green: an exit or objective zone. |
| 5 Mission | The job: difficulty, pay, salvage share, deadline, objective, terrain. ▾ BRIEF opens the full mission text. |
| 6 Lance orders | Who to shoot first, when the lance pulls out, and when the replay pauses for you. |
| 7 Go | ◂ SHIP goes back aboard, AUTO-RESOLVE fights without showing it, DEPLOY ▸ starts the battle. |
Each 'Mech's orders
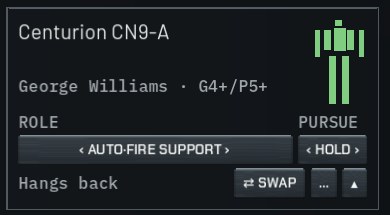
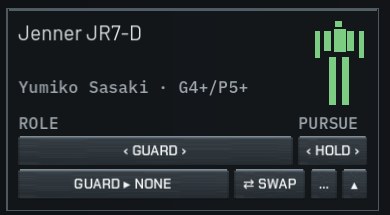
| Role | What the 'Mech does |
|---|---|
| AUTO | Picks a role from its build: the chassis and weapons decide. Shown as, for example, "AUTO-SKIRMISH". |
| BRAWL | Closes in and fights close. |
| SKIRMISH | Holds range and trades shots at the distance its weapons hit hardest, moving to stay hard to hit. |
| FIRE SUPPORT | Hangs back at its longest weapon's reach and looks for cover. |
| FLANK | Closes to point-blank and works round to the enemy's sides and rear. |
| GUARD | Stays with one lancemate and covers it. |
| COMMAND | The Commander's own 'Mech: always stays with the lance. |
- PURSUE: CHASE runs down a broken, fleeing enemy; HOLD keeps to its role.
- ⇄ SWAP puts a different 'Mech in this seat. … opens the 'Mech's details. ▲ folds the card.
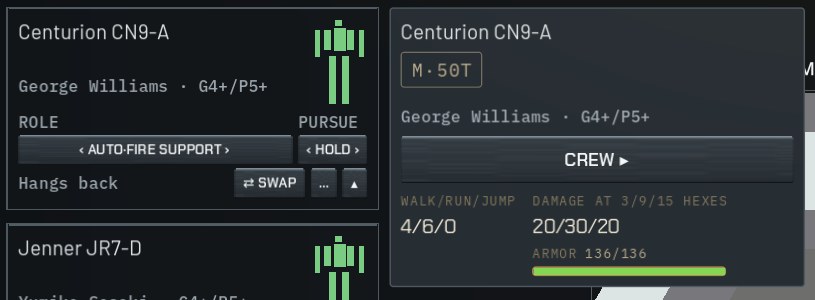
Lance orders
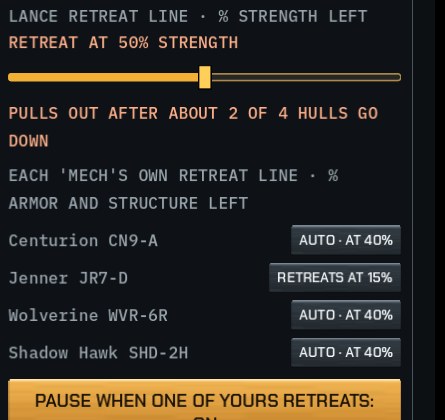
- Focus fire: BY ROLE lets each 'Mech choose by its role. NEAREST, MOST DAMAGED and HEAVIEST make the whole lance pick targets that way.
- Lance retreat line: the whole lance pulls out when its strength falls to this percentage. The line under the slider translates it ("pulls out after about 2 of 4 hulls go down").
- Each 'Mech's own line: a single 'Mech leaves the field when its own armour and structure fall this low. AUTO picks a sensible line for its build.
- Pauses: the replay stops for you when one of yours retreats, and on the moments you switch on: a critical hit, a kill, one of your units going down, the objective, each new turn.
The mission brief and intel
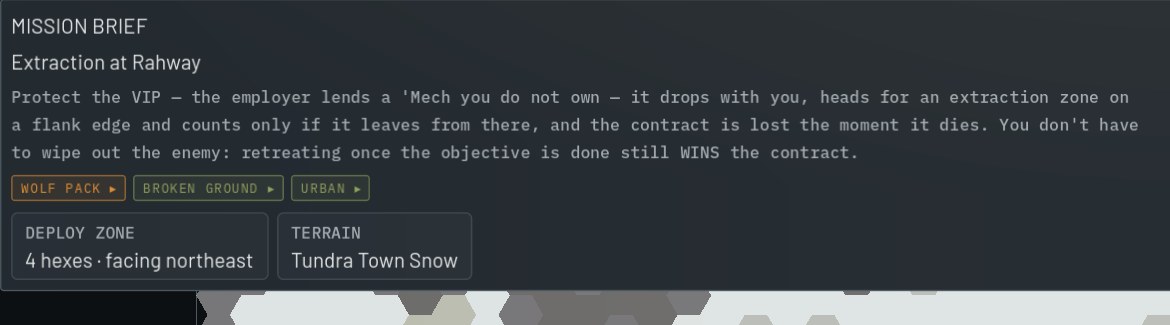
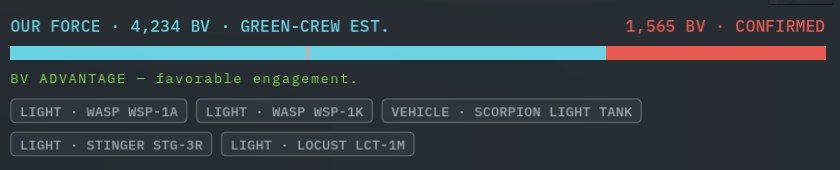
Intel comes in three steps, bought in contract negotiation: the map (lets you choose your landing edge), the enemy force, and a reinforcement warning.
Dropping the Commander
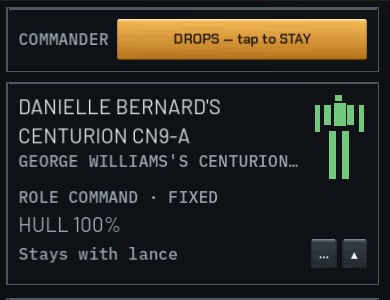
A dropping Commander adds a strong pilot and earns more experience, but takes a lance seat. If the Commander dies, the run is over. Staying aboard is safe and gives the lance passive bonuses instead.
AUTO-RESOLVE plays the same battle with the same rules without showing it. It names the odds and asks you to confirm.
The battle: reading the screen
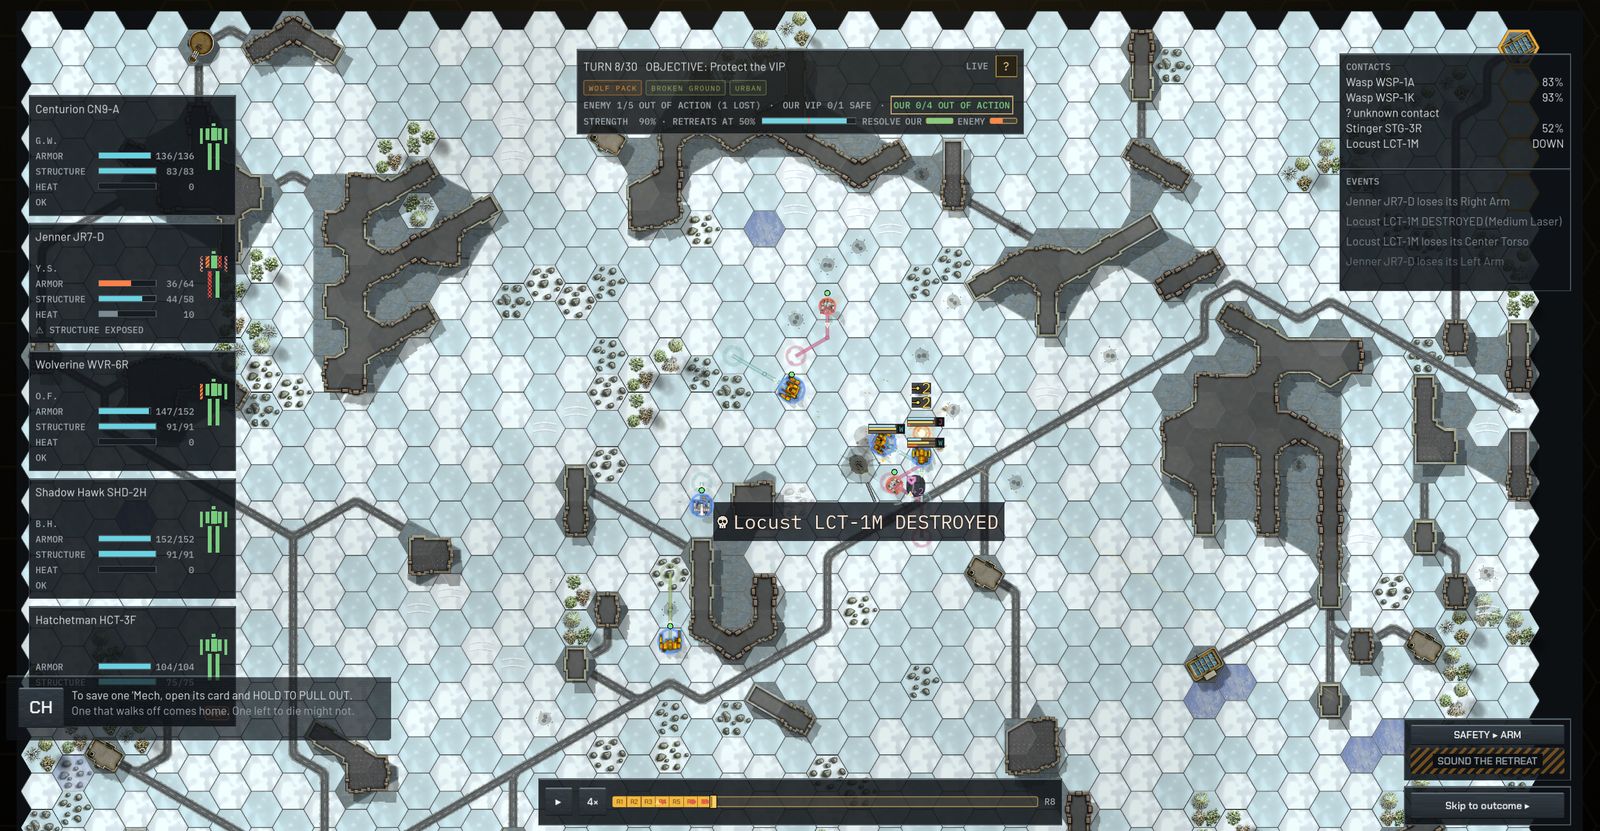
The battle plays out turn by turn on a hex map, like a tabletop game being replayed for you. You can't steer your pilots, but you can pause, rewind, look at any unit, and call a retreat. Everything below is information to help you understand what's happening and plan better next time.
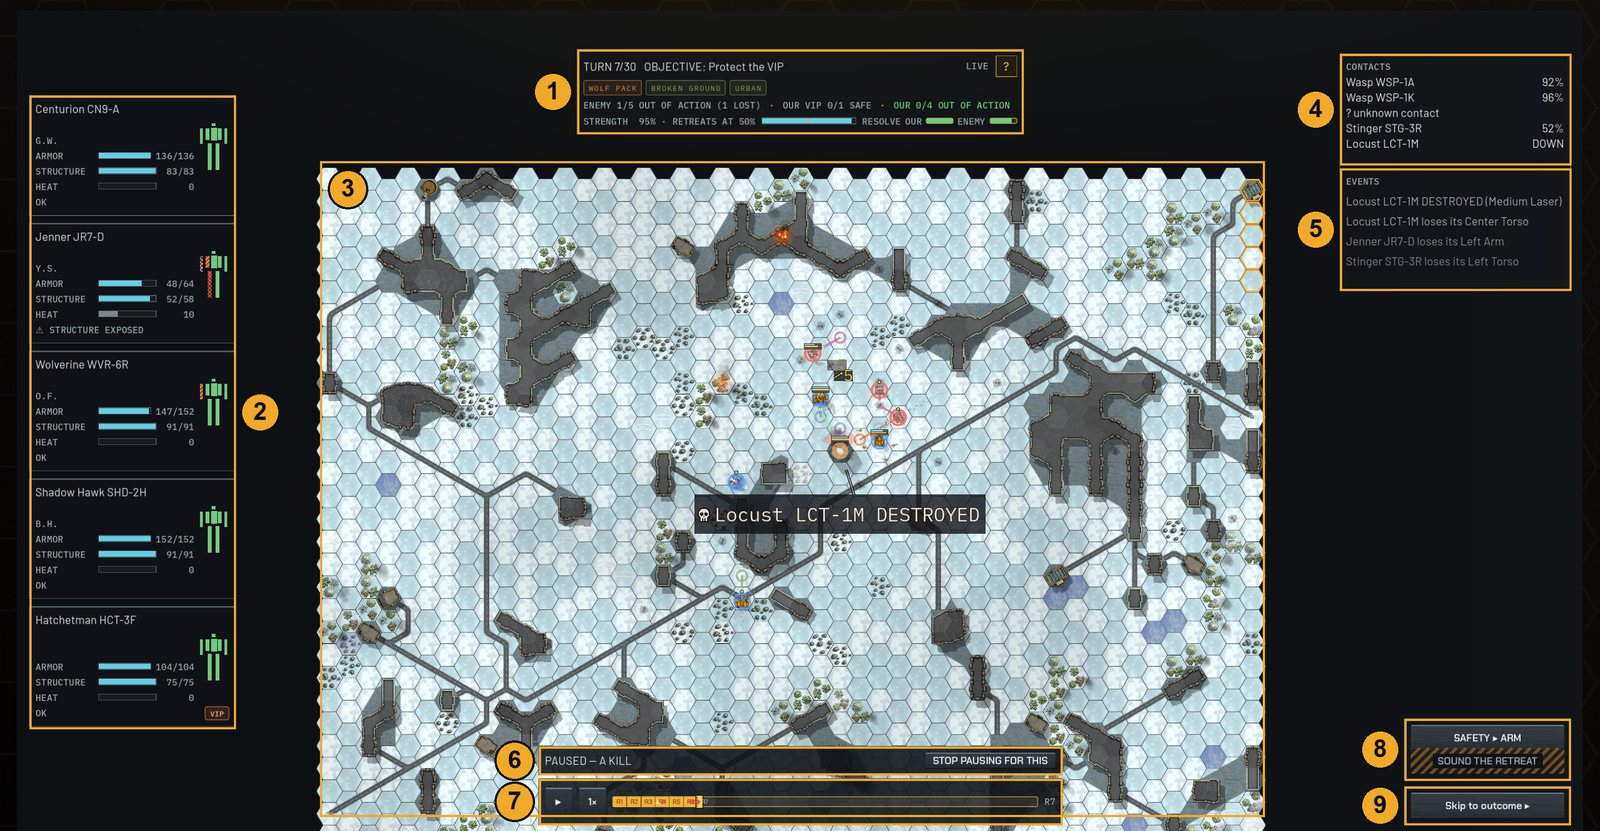
| 1 Status | Turn, objective, the mission's tags, who is out of action on each side, your strength against your retreat line, and both sides' resolve. ? asks the Chief for a tip. |
| 2 Your lance | One card per unit: armour, structure, heat and a damage silhouette. Click a card for details. |
| 3 The board | The battlefield. Your units and the enemy's, with movement paths and shots drawn as lines. |
| 4 Contacts | Enemies you have spotted and how much armour each has left. Unseen ones show as "? unknown contact". |
| 5 Events | What just happened, newest first: hits, lost limbs, destroyed parts, kills. |
| 6 Pause strip | Appears when the replay stops itself and says why. STOP PAUSING FOR THIS switches that pause off. |
| 7 Playback | Play/pause, speed and the scrub bar (rounds R1, R2… with marks for kills and crits). |
| 8 Retreat | Flip SAFETY, then SOUND THE RETREAT to pull the whole lance out. |
| 9 Skip | Jump to the result. After the fight it becomes Continue ▸ After-action. |
1 · The status strip

- TURN 7/30: a battle lasts at most 30 turns; after that it's a draw.
- Tags such as WOLF PACK or URBAN are the mission's conditions (enemy tactics, terrain, weather).
- ENEMY 1/5 OUT OF ACTION: destroyed or fled, out of the enemy's total. OUR 0/4 is the same for you.
- STRENGTH 95% · RETREATS AT 50%: your lance's remaining strength. When the bar reaches the red notch, the lance pulls out, as you ordered in the brief.
- RESOLVE: each side's will to fight. It drops as a side loses units. When it breaks, that side runs.
- LIVE means you're watching the newest moment; after rewinding it reads BACK TO LIVE.
2 · Your lance cards
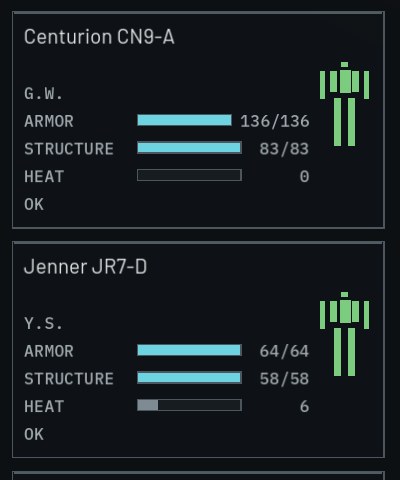
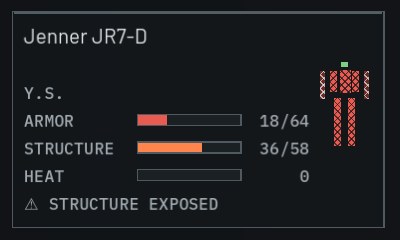
- ARMOR goes first. STRUCTURE is the skeleton beneath; when it is hit, parts break and the warning line says so.
- HEAT above zero slows the 'Mech and spoils its aim. Very high heat can shut it down or cook off its ammo.
- The letters under the name are the pilot's initials. A VIP tag marks a 'Mech you must protect.
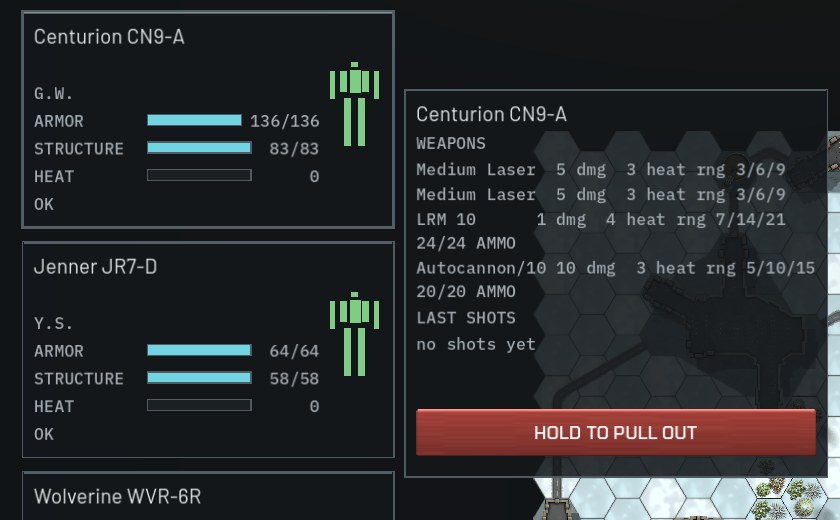
3 · The board
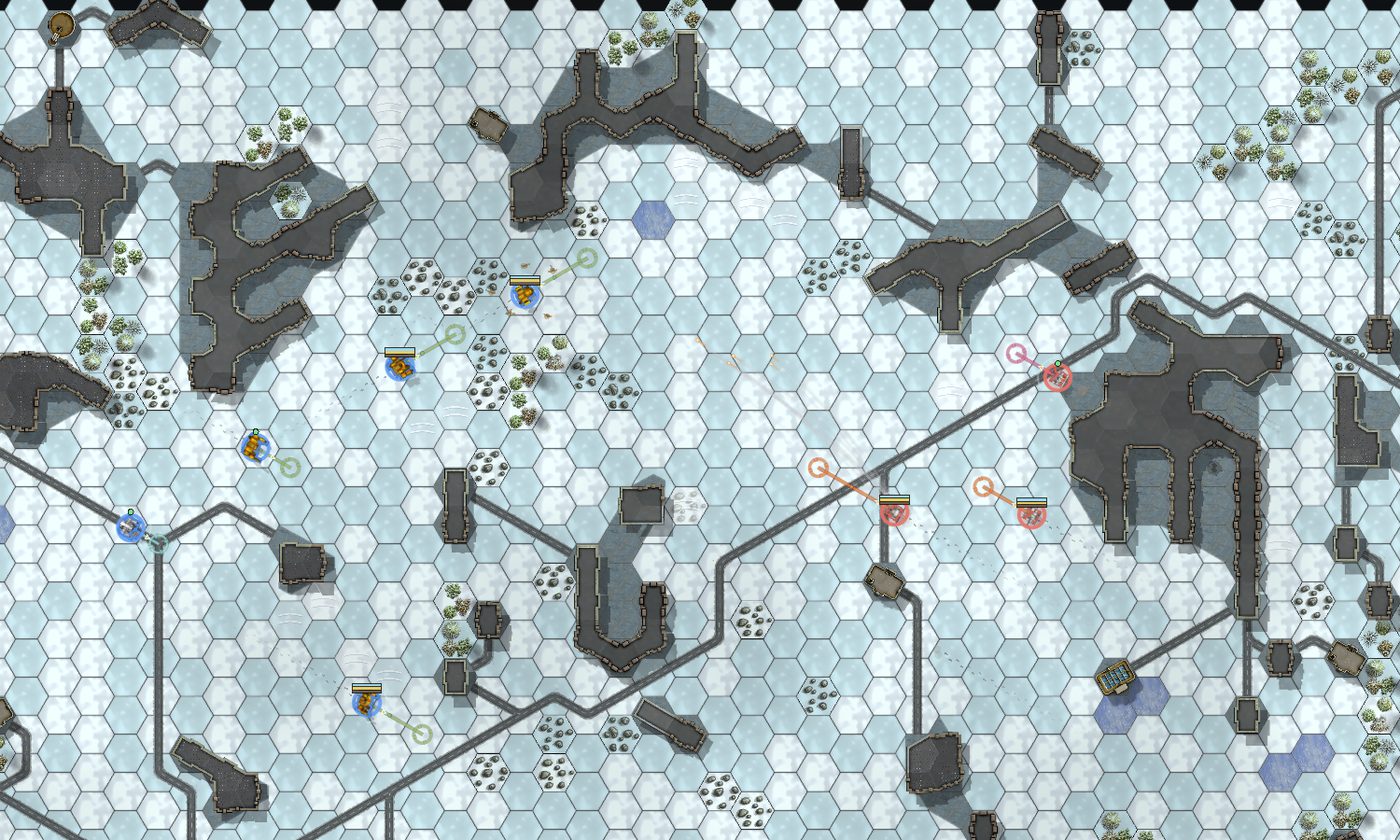
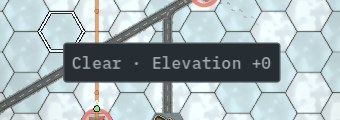

- Height matters: grey ridges and buildings block shots and give cover. Woods and rough ground slow movement.
- Moving fast makes a unit harder to hit but also hurts its own aim.
- Facing: every 'Mech faces one way and can twist its torso one side left or right. Shots from behind hit thin rear armour.
- Mouse: wheel to zoom, drag to pan. F re-centres on the fight, E shows hex heights, Tab fades the panels so you can see the whole board.
4 and 5 · Contacts and events
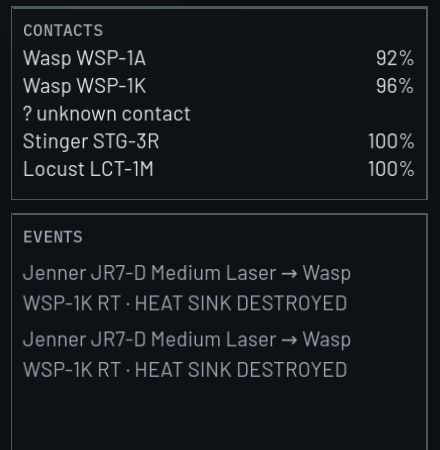
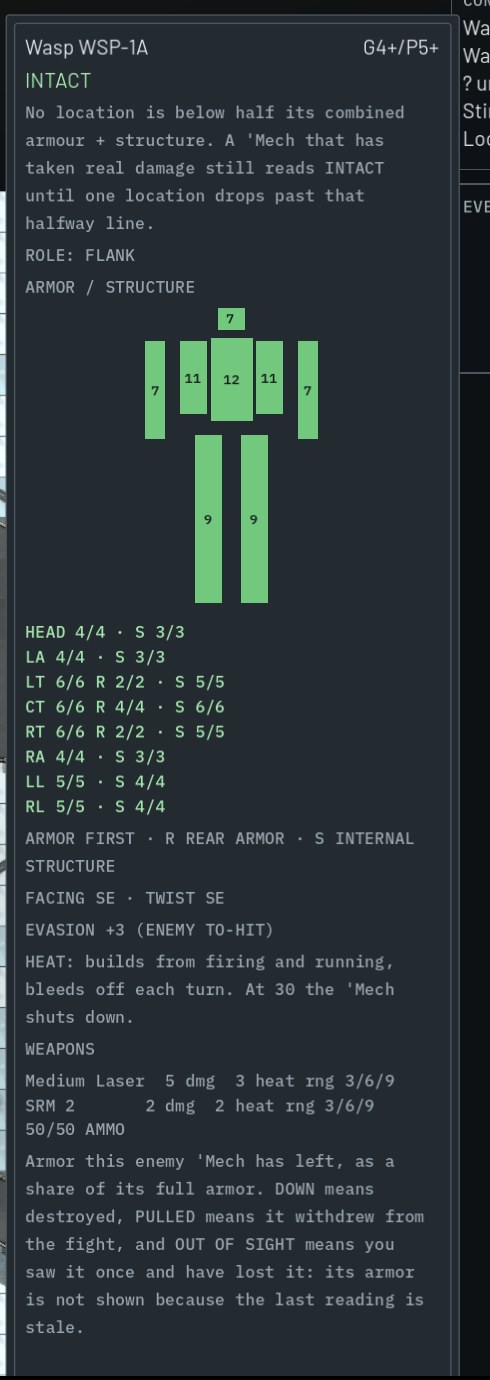
Contacts can read DOWN (destroyed), PULLED (fled the field) or OUT OF SIGHT SINCE TURN n.
6 and 7 · Pauses and playback
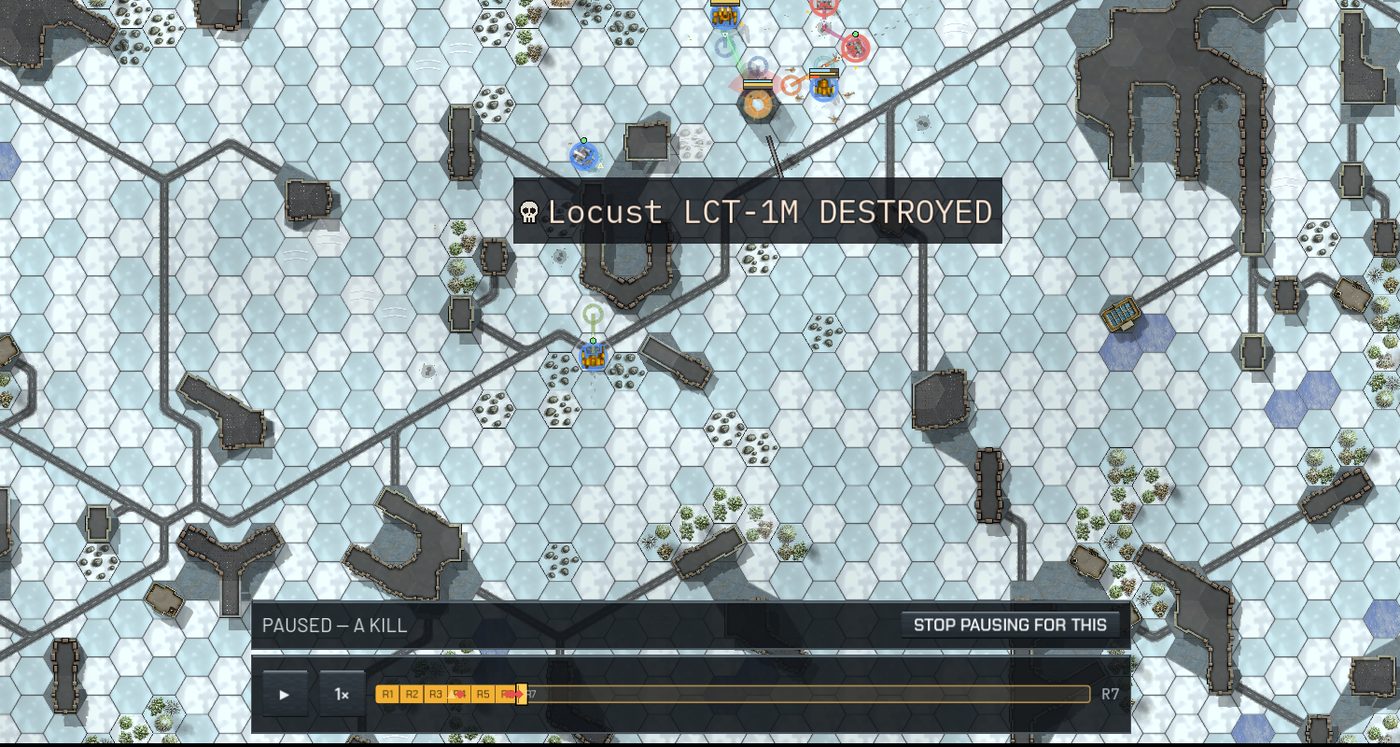

| Key | Does |
|---|---|
| Space | play / pause |
| = · − | faster / slower (1×, 1.5×, 2×, 4×) |
| ] · [ | step one moment forward / back |
| Home | back to the start |
| F · E · Tab | re-centre · heights · fade panels |
| Enter or C | skip to the result / continue |
| Esc | close the open card drawer |
You can drag the scrub bar or click a mark to jump to any moment you have already watched.
8 · Sounding the retreat
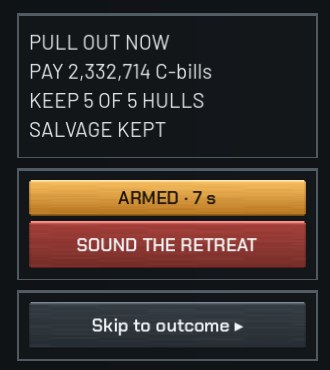
- Press SAFETY ▸ ARM. It stays armed for 8 seconds.
- Read the plate: pay, hulls kept, salvage.
- Press SOUND THE RETREAT. The whole lance pulls out from this moment on.
Whether you still get paid depends on the contract and the objective; the plate tells you before you commit. A 'Mech that gets away comes home. You can only sound the retreat while watching a battle for the first time.

When it's over
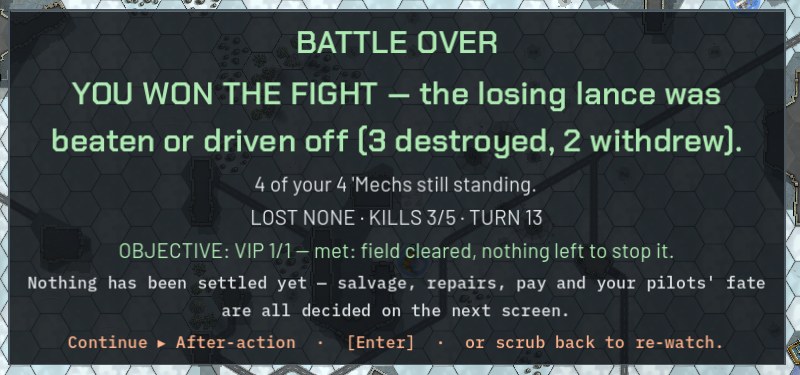
From the debrief, REVIEW THE BATTLE ▸ replays the whole fight.
The rules underneath
| Turns | Each turn every unit moves, then everyone fires at once, then physical attacks. Who moves first is rolled. |
| Movement | Walk, Run or Jump, with each design's real MP. Rough ground, woods, water, snow, mud and each level of height cost more. |
| To hit | The pilot's gunnery, plus range (short +0, medium +2, long +4), plus the shooter's own movement, plus the target's evasion and cover. 2d6 must meet the total. |
| Weapons | Real ranges in hexes: a medium laser reaches 3 / 6 / 9. Missiles roll how many hit. |
| Heat | Walking, running, jumping and firing build heat; heat sinks shed it. Hot 'Mechs move slower and shoot worse; at 30 they shut down. |
| Hit location | 2d6 on a table for the side you're hit from. A 12 hits the head. |
| Critical hits | Damage that reaches structure can wreck engines, gyros, weapons, heat sinks and ammo bins. |
| Ammo | An exploding bin is deadly. Your pilots auto-eject first (you can switch this off). |
| Falls | Heavy damage, a broken gyro or a leg hit can knock a 'Mech down and hurt its pilot. |
| Physical | Punch, kick, charge, and death from above (jumping onto an enemy). |
After the battle
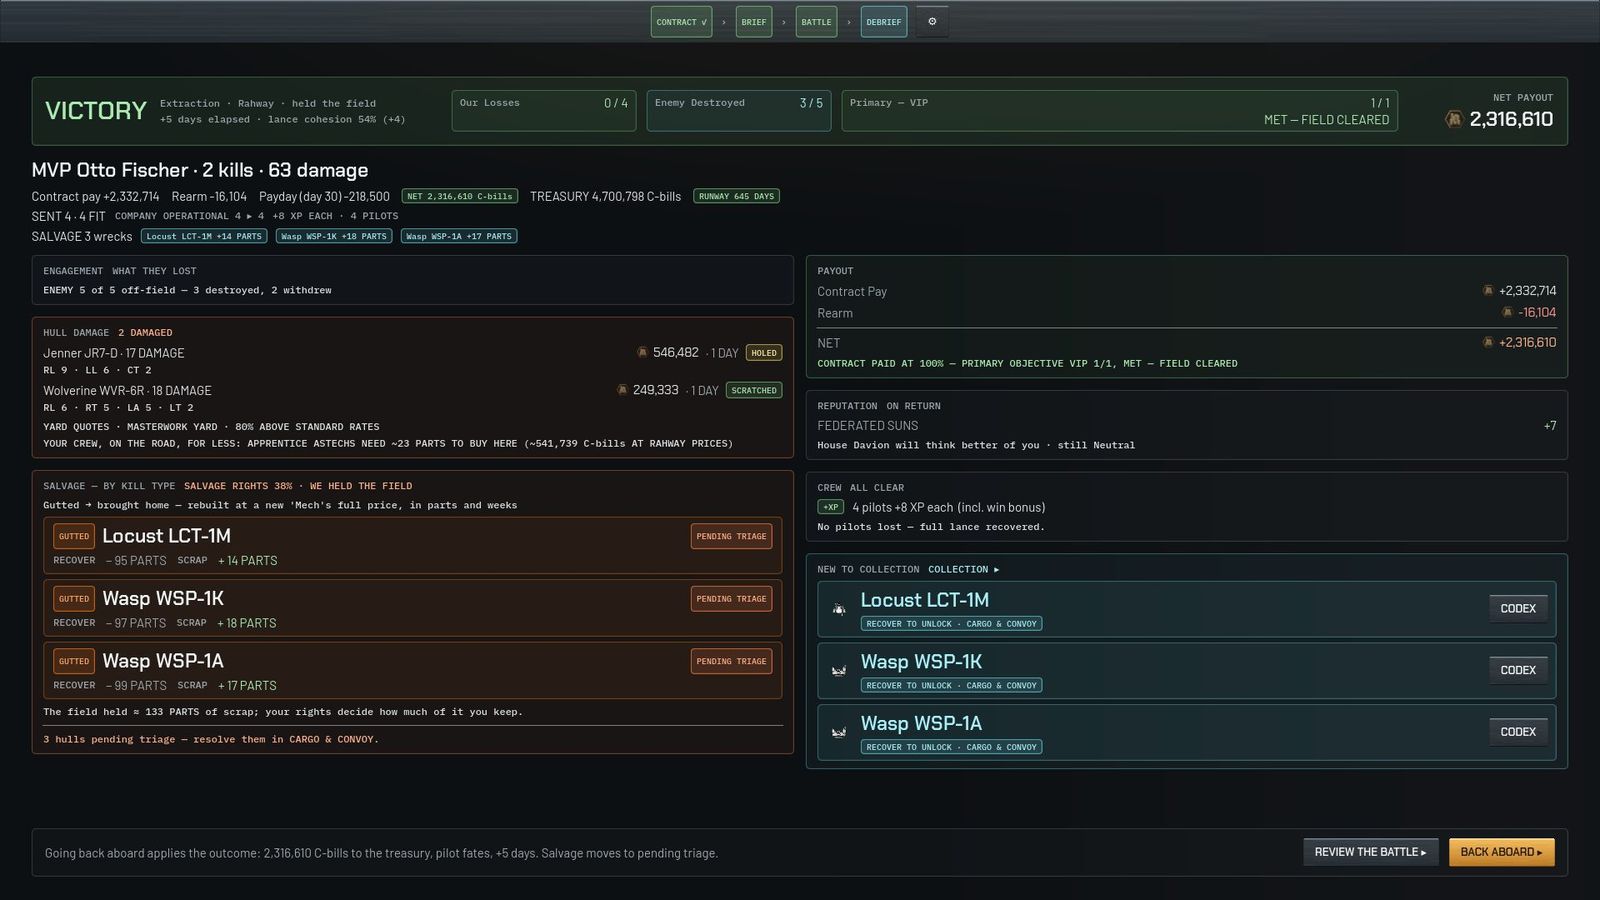
Salvage is a draft
Your salvage rights give you an allowance, a share of the value of everything left on the field. Each wreck you claim spends its value. What you don't spend arrives as spare parts. The employer keeps the rest.
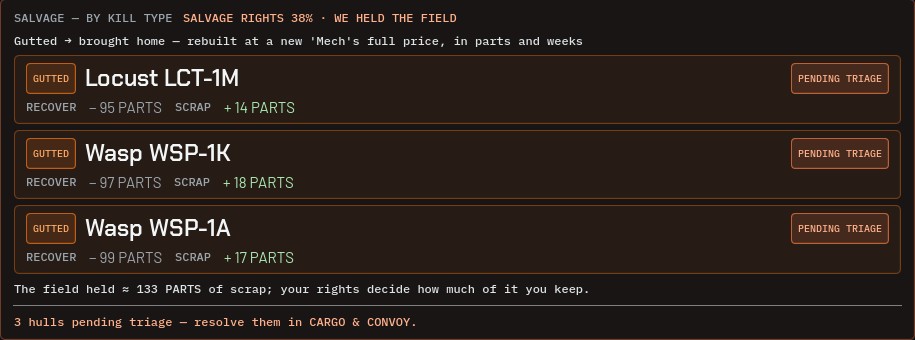
| Tag | How it died | What you get |
|---|---|---|
| HEAD-SHOT | cockpit destroyed | the pilot is dead, the hull nearly whole: the cheapest rebuild |
| ABANDONED | the pilot ejected | cheap to rebuild |
| LEGGED | both legs gone | a normal rebuild |
| GUTTED | centre torso shot out | brought home, rebuilt at a new 'Mech's full price, in parts and weeks |
| CORED | engine destroyed | double cost; often only scrap |
'Mechs, repairs and field mods
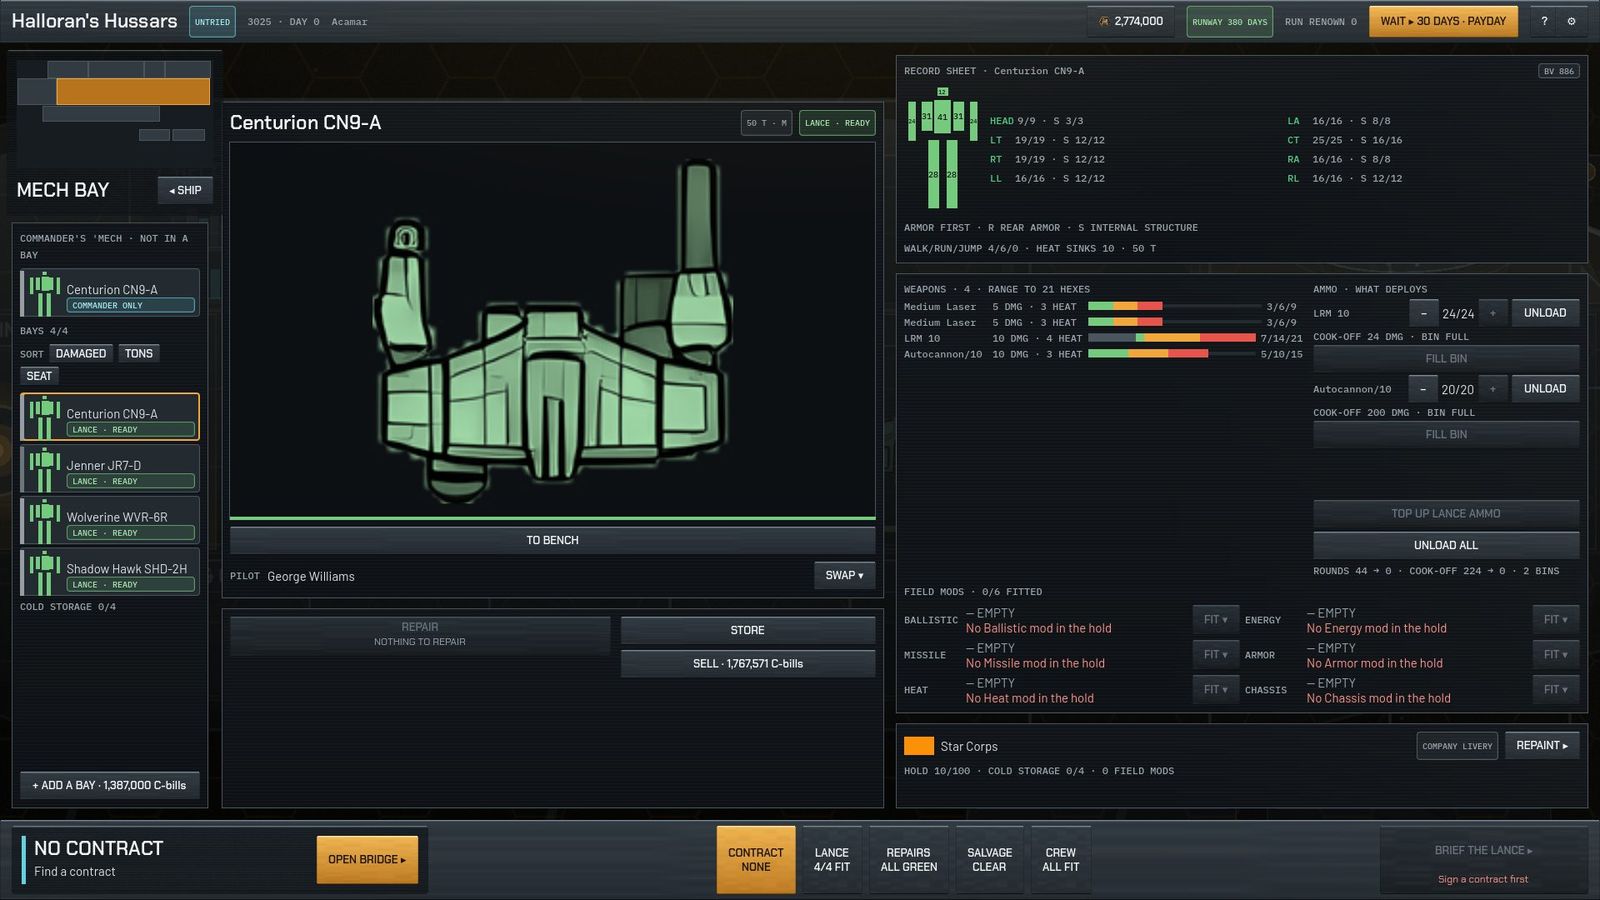
Getting fixed
- Astechs repair a little every day for free while you travel and wait. You start with one; each bay supports two.
- A yard (a world with a repair bay) fixes faster: 25% deposit, then daily instalments. Leave early and you lose what you paid.
- REPAIR ALL books every damaged 'Mech you can pay for in full, lance first, then cheapest. It never puts you into debt.
- A GUTTED 'Mech waits 28 days in the yard.
Field mods
Six typed slots per 'Mech, each a small upgrade on top of the real design:
| BALLISTIC | autocannon and gauss: damage, accuracy, crits, range |
| ENERGY | lasers and PPCs: damage, heat, accuracy, range |
| MISSILE | LRM and SRM: damage, accuracy, cluster hits, range |
| ARMOR | extra armour and structure |
| HEAT | cooler running, safer shutdown and ammo rolls |
| CHASSIS | more walk, run or jump; harder to hit |
Space
- Bays hold the 'Mechs you can field. Cold storage keeps spares, but nothing in it is repaired or fielded.
- The hold starts at 100 space: a hull takes 1 per ton, 10 parts or 5 rounds take 1, a field mod takes 1.
- Engineering sells upgrades: +1 bay 1,387,000, +50 hold 555,000, +2 bunks 666,000.
- Loading ammo is free; you pay for the rounds you fire.
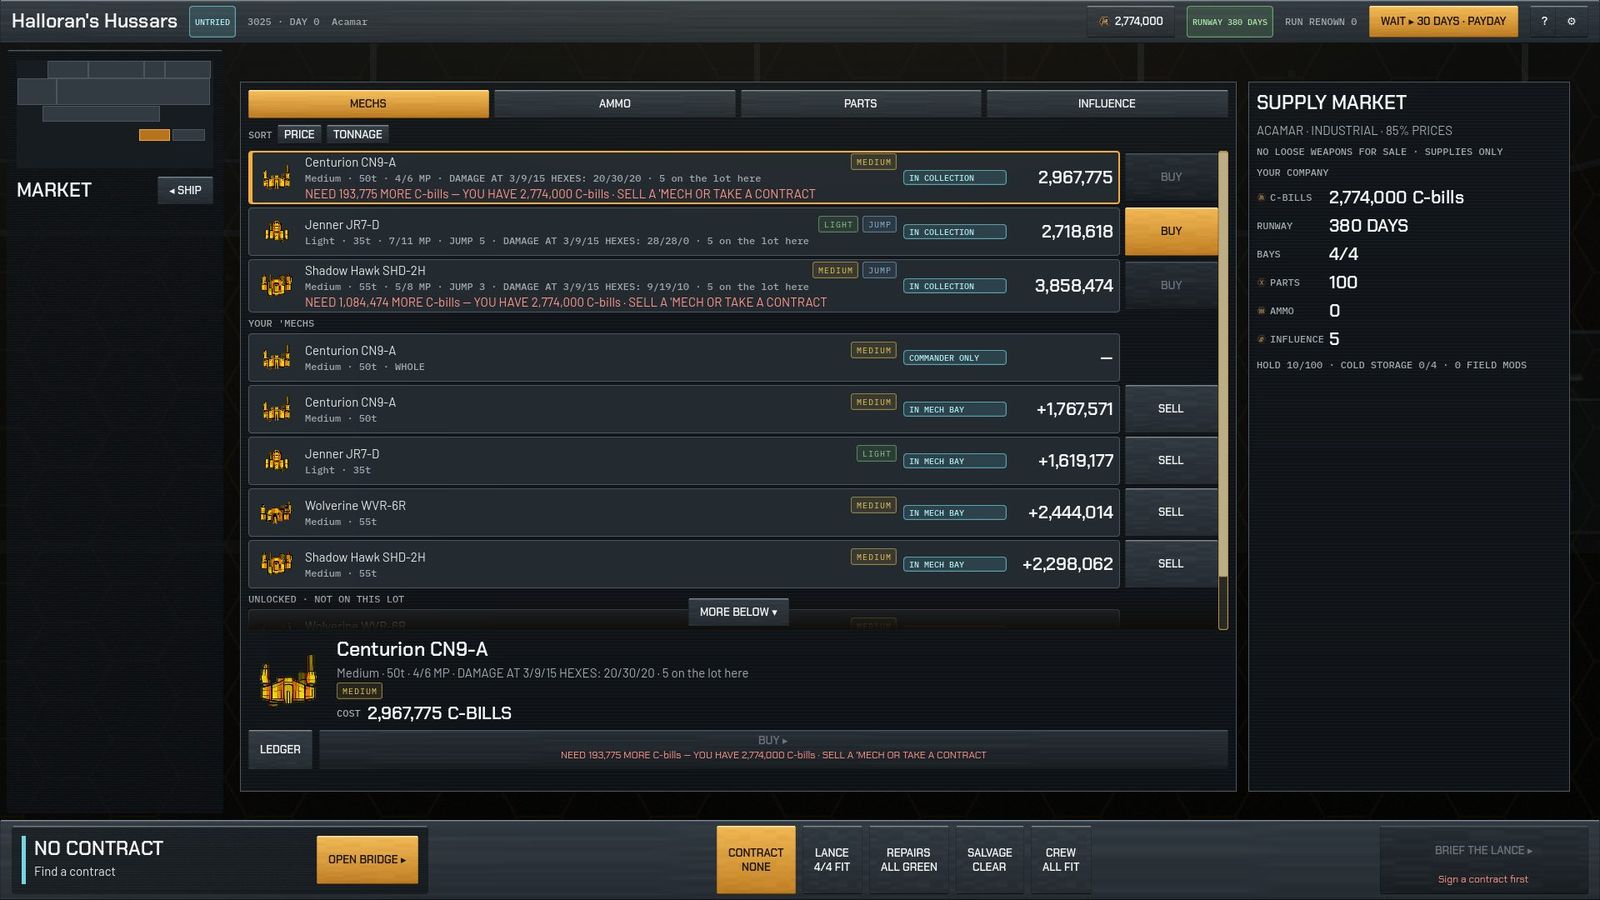
Vehicles. Tanks and hovercraft are on the market too, and they sit in the Mech Bay like 'Mechs. A vehicle comes with its own crew, so it can drop without one of your pilots; seat a pilot in it and it fights better. A vehicle has one damage pool instead of body parts: when its armour and structure run out, it's destroyed.
People
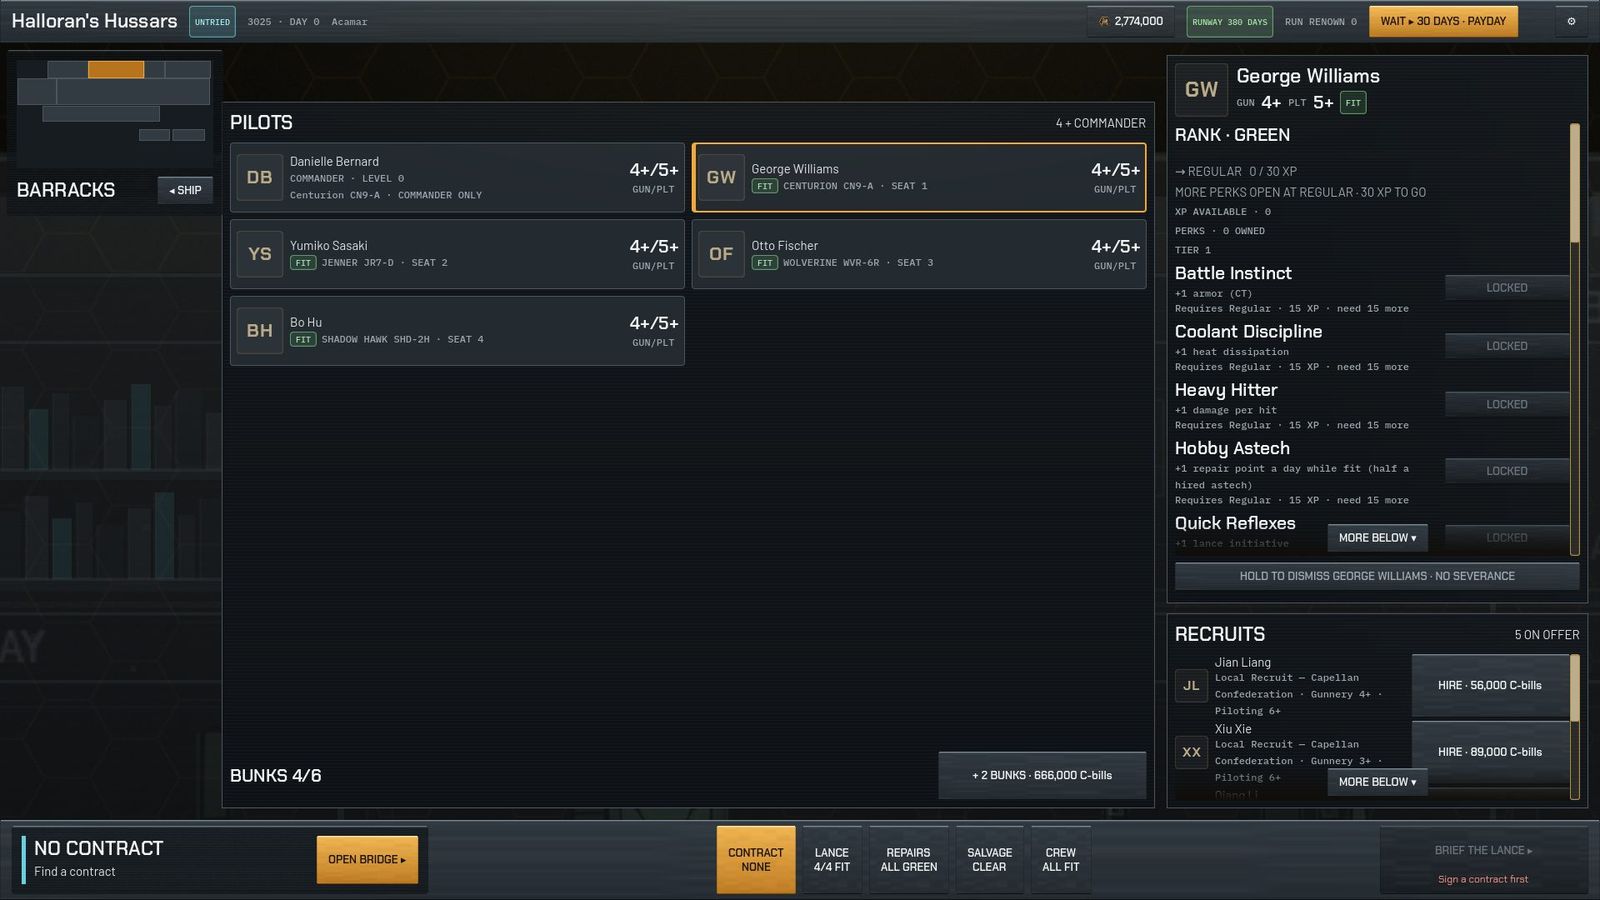
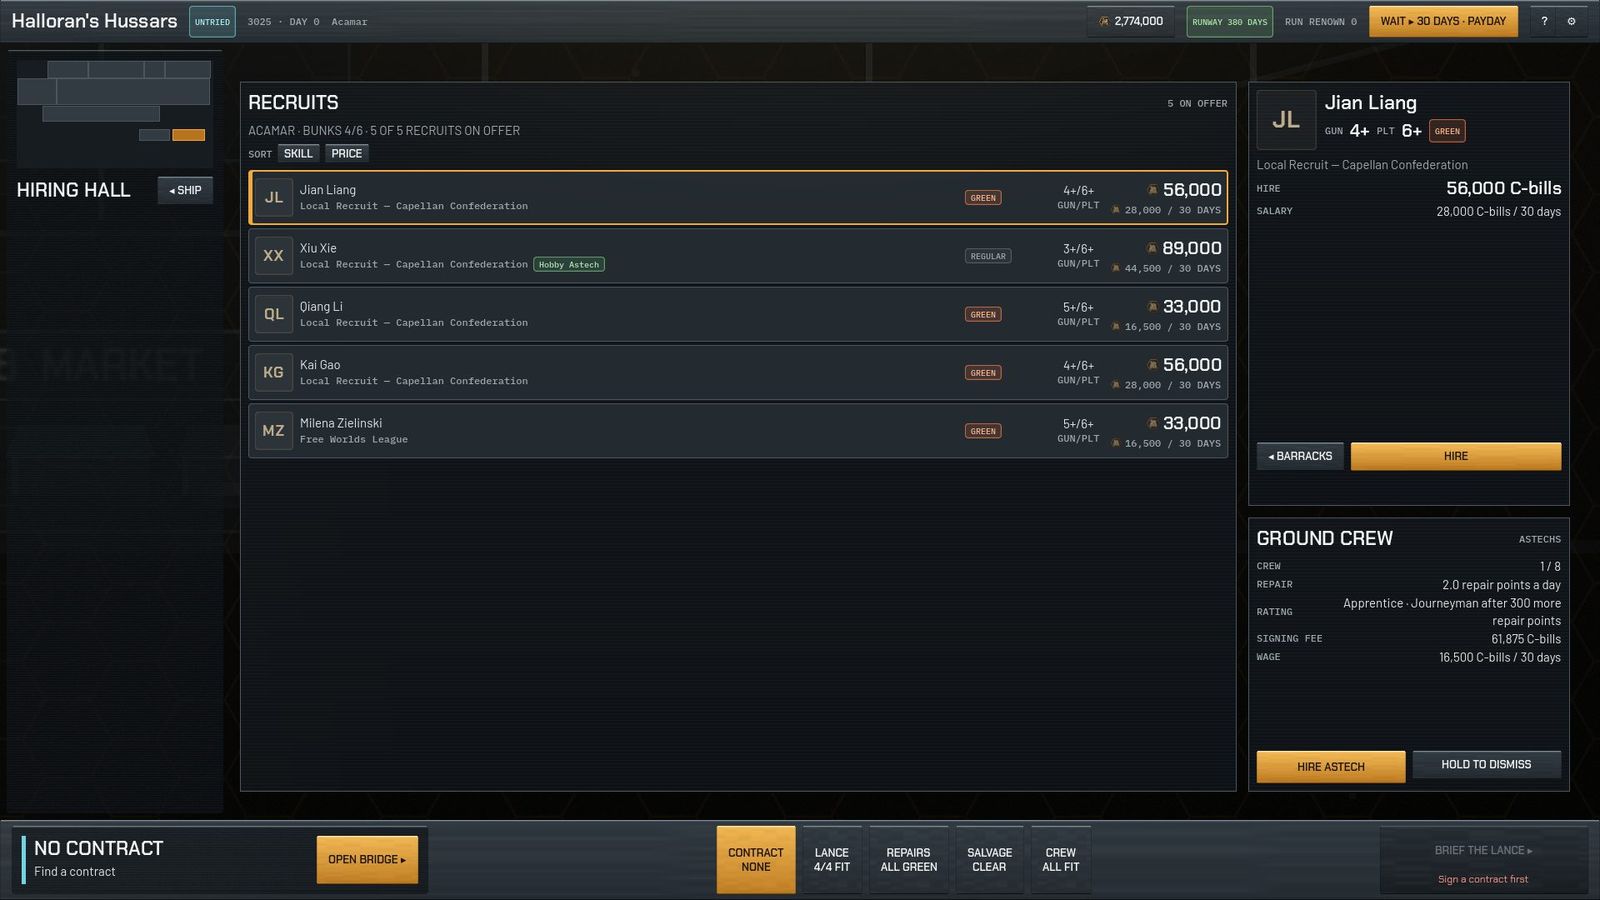
Pilots
- Gunnery and Piloting: lower is better. New hires are usually 4 / 5.
- XP: 5 per battle, +3 for a win. Ranks run Green, Regular (30), Veteran (90), Elite (200), Ace (400).
- Perks (22 of them) cost 15, 40 or 90 XP. Spending XP never lowers rank.
- Injury keeps a pilot out for 21 days. Some fights leave a flaw, a few of them permanent.
- Death: a head-shot always kills. An engine kill (cored) kills about 1 time in 6; otherwise the pilot is hurt.
- The hiring pool refreshes every 30 days. Veterans you kept from earlier companies can turn up.
The Commander
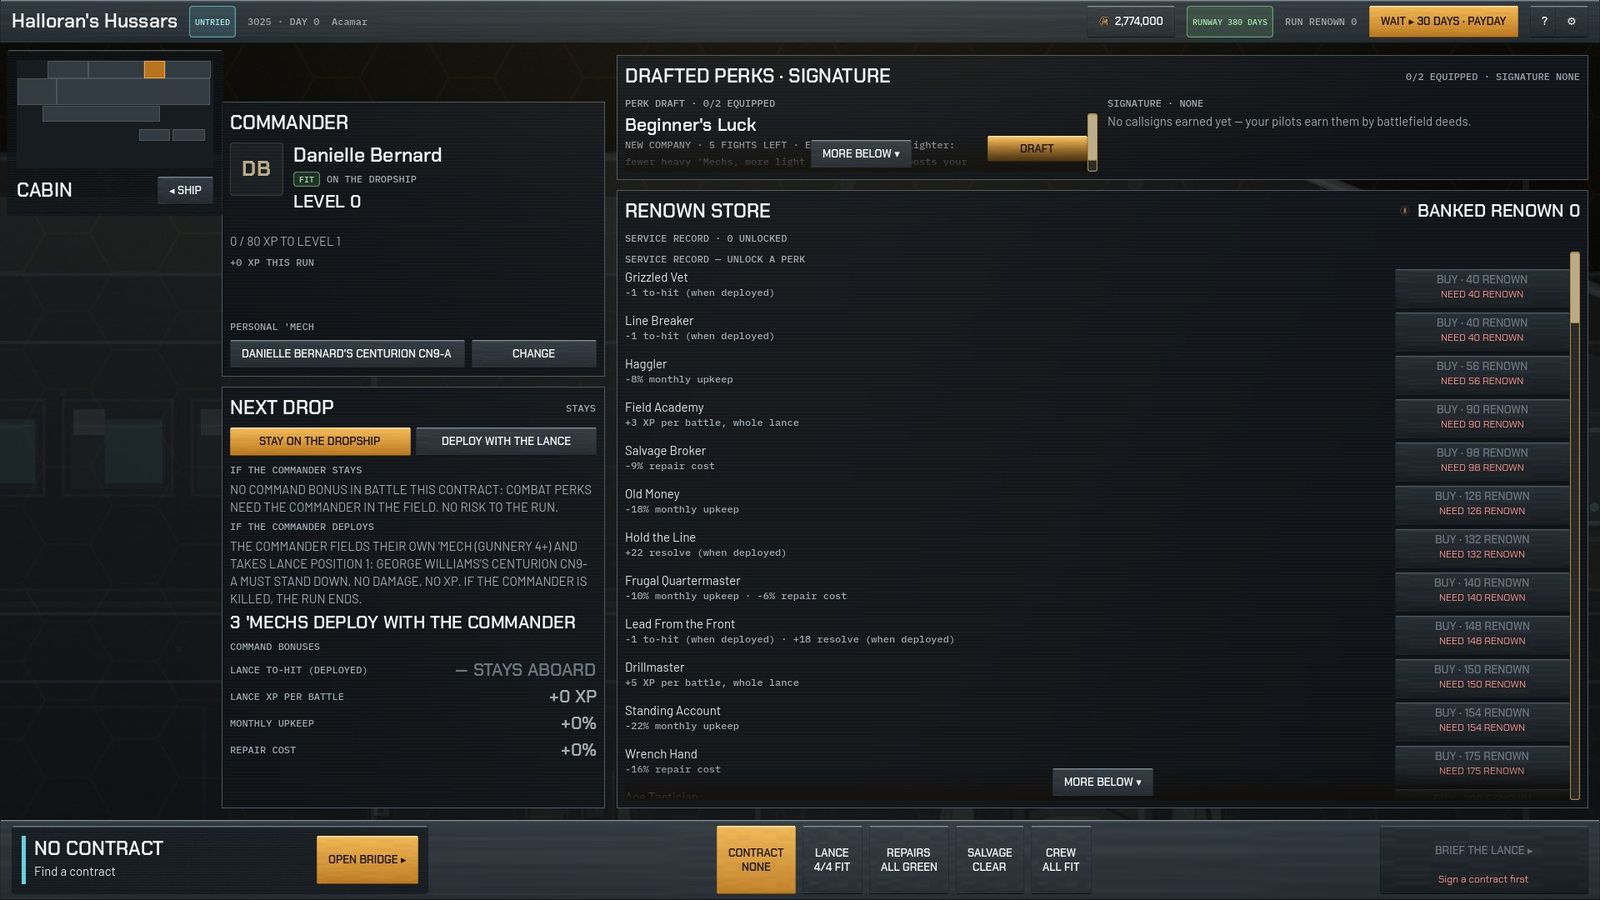
- Before each contract the Commander either stays aboard and gives the lance passive bonuses, or drops in their own 'Mech.
- If the Commander is killed, the run ends. If they're wounded or captured, it goes on. A captured Commander can try to escape.
- The Commander's 'Mech always comes home, however badly it's hurt.
- They level up (to level 6) from battles and buy perks with renown.
Standing and rank
Standing with each House (−100 to +100)
| BLOOD FEUD | −80 or lower |
| HOSTILE | −50: this House stops offering you contracts |
| WARY | −20: travel there is marked HOSTILE |
| NEUTRAL | where everyone starts |
| KNOWN | +20 |
| LIKED | +40: first time pays 3 influence |
| HONORED | +70: first time pays 5 influence |
Every 10 points of standing raises the salvage cap and the advance by 5% and cuts intel prices by 5%. Fighting a House's forces costs 4 standing with it.
Company rank
UNTRIED → BLOODED → SEASONED → FEARED → FAMED. Rank decides how hard an offer can be (difficulty 2 for an untried company, up to 5), and opens operations from Blooded on.
The long game
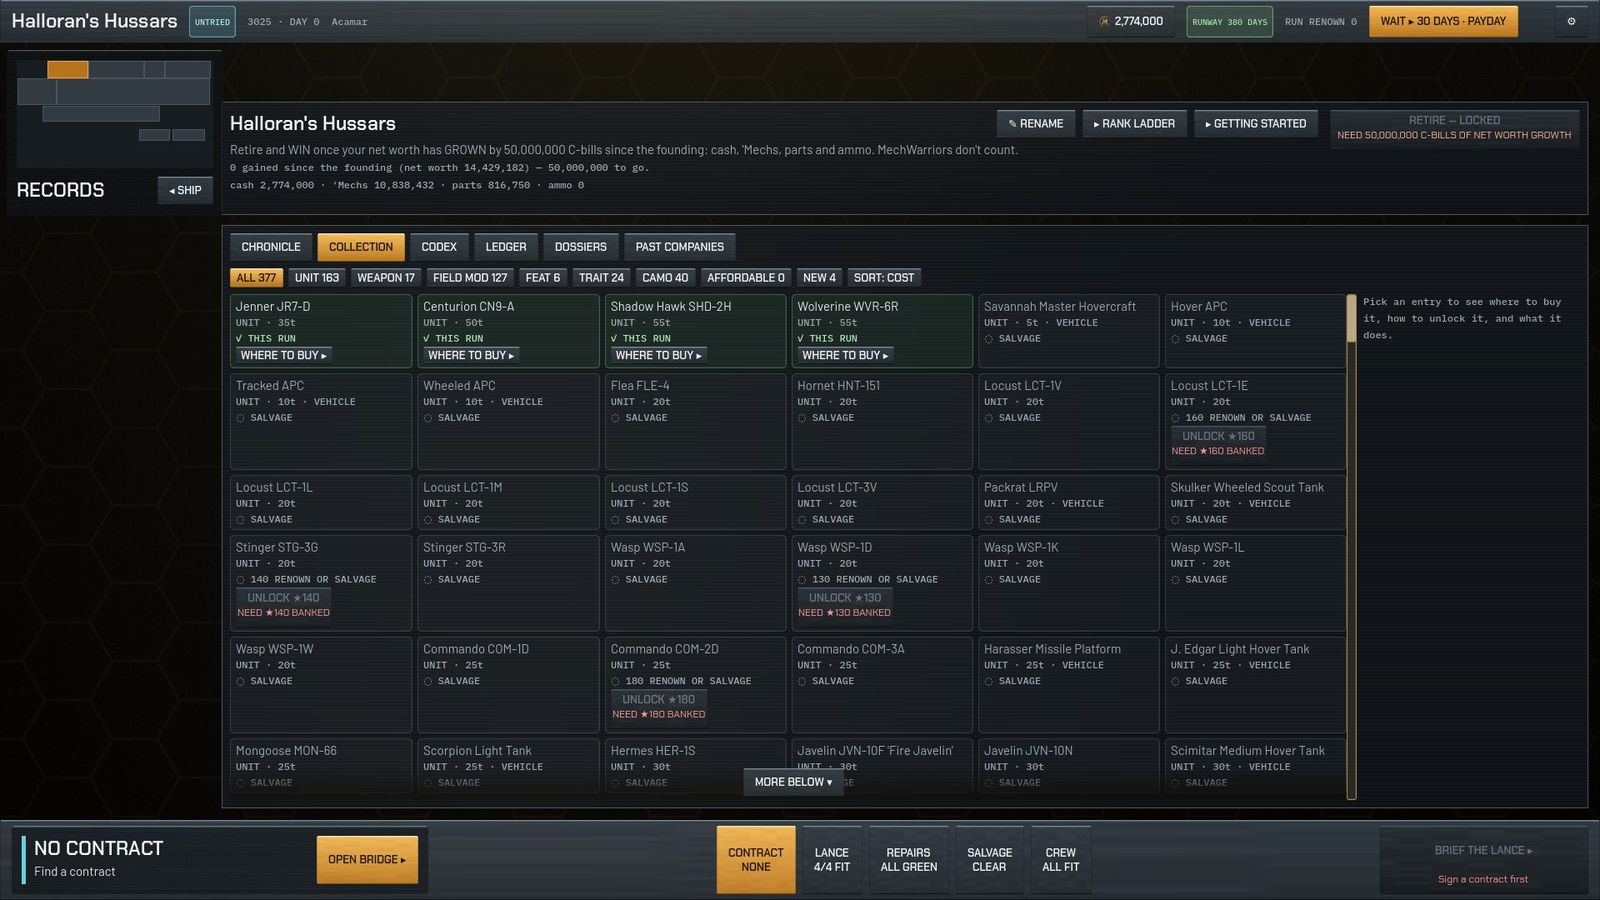
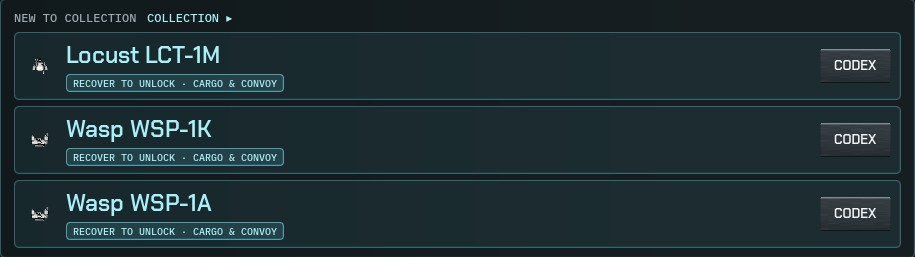
- The Collection is shared by every company you ever found. An unlocked design shows up on markets; you still have to buy it.
- Renown is earned from contracts, wins, kills and callsigns, and banked when the run ends. Retiring pays the most.
- The Renown store sells designs, field mods, Commander perks and a head start in standing.
- Origins unlock through deeds: win 2 contracts, survive 365 days, earn 20 kills, reach standing 40 with a House…
- Three company slots on the main menu; all three share one Collection.
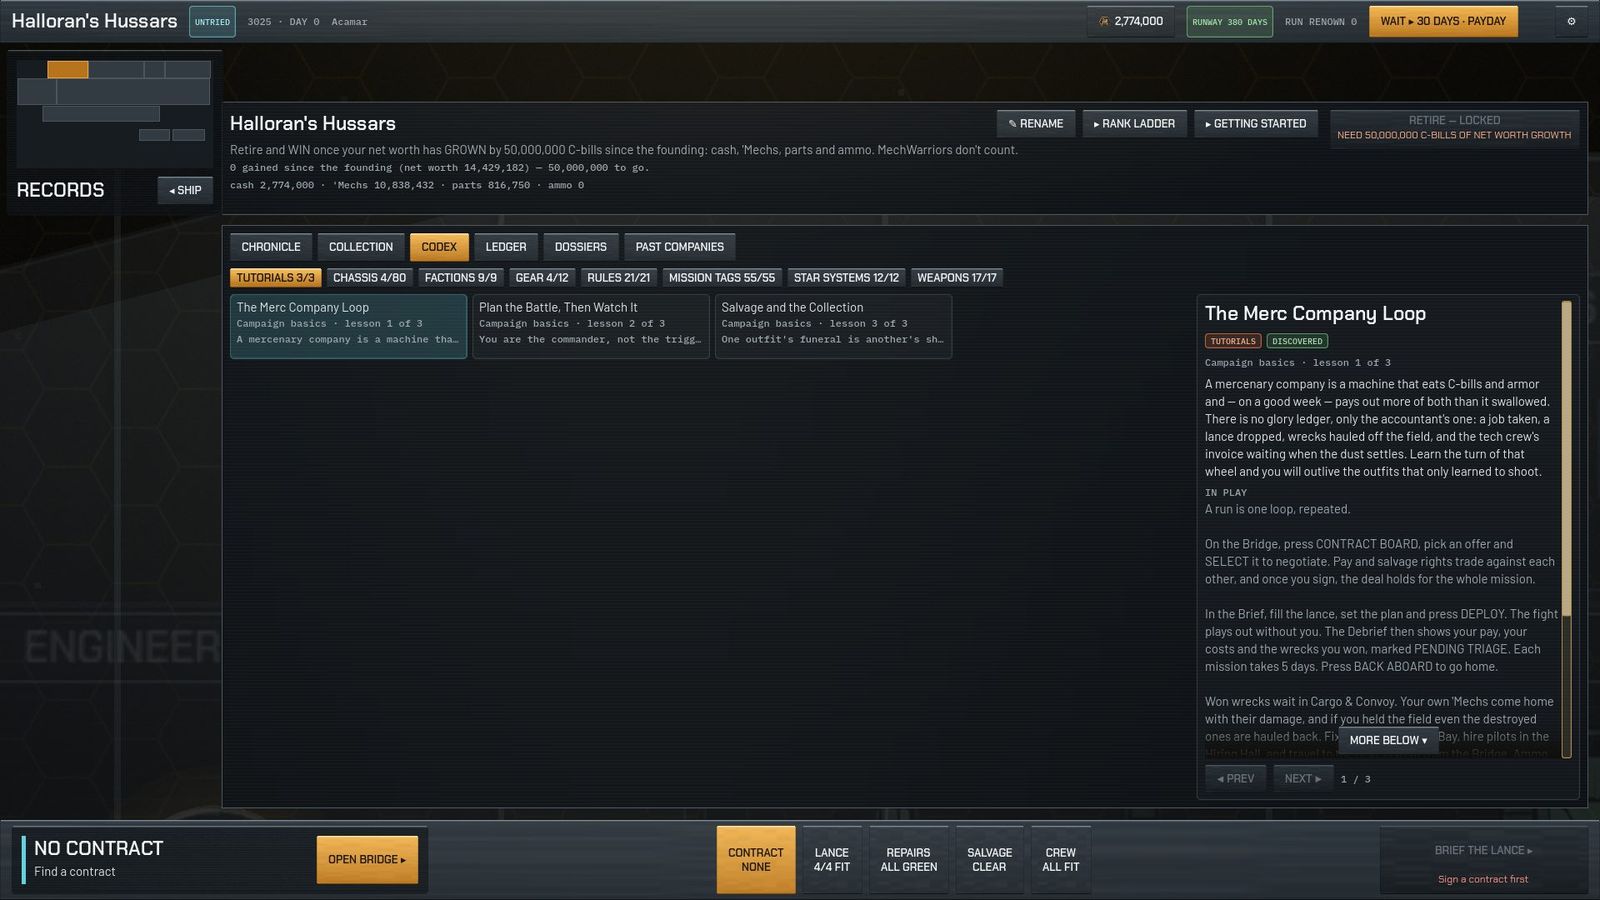
- The codex (Records › Codex) explains 209 things: designs, weapons, mechanics, factions, worlds.
Help and settings
- The Chief walks a new company through its first days, one room at a time. You can skip it.
- ? in the top bar explains the room you're in. Hover almost anything for a tooltip.
- F8 files a bug report with a screenshot. Please use it whenever something looks or feels wrong.
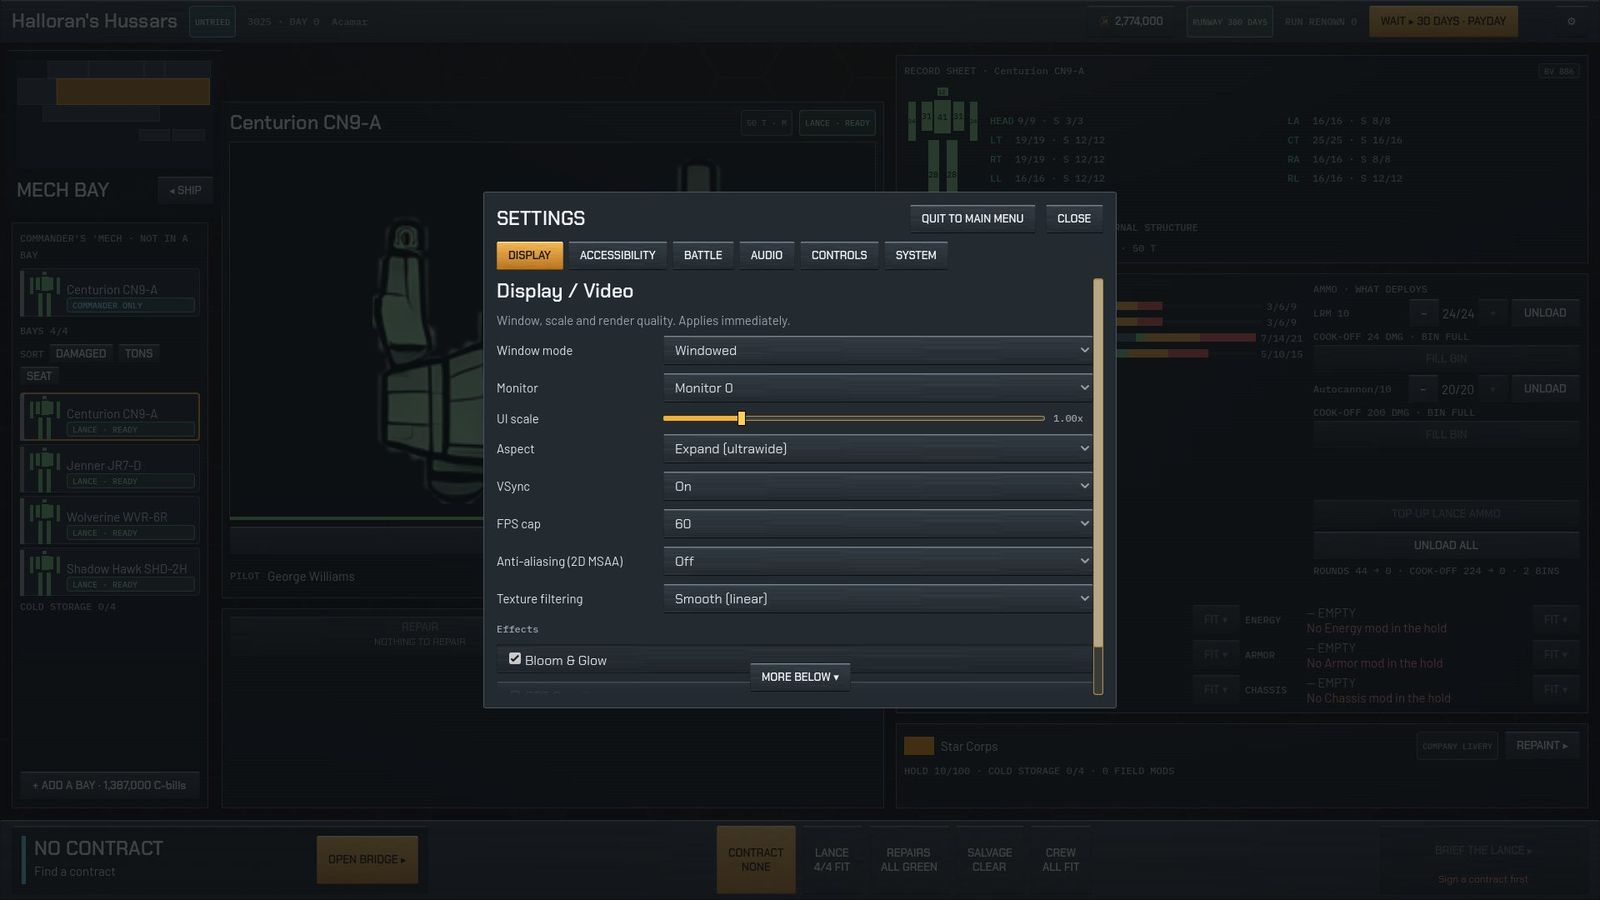
- Settings › Accessibility: text size 85-150% (default 115%), colourblind palettes, font choice, spacing, reduced motion.
| Key | Does |
|---|---|
| 1-9 | open a room |
| / | search the star map |
| L · Shift+L | next and previous map lens |
| Home · + · − | recentre and zoom the map |
| Enter | plot the jump to the selected world |
| Esc | close a panel or go back |
| F8 | report a bug |
Still coming before testers
- A living reputation web: a win or a betrayal ripples to allies and rivals and fades over months; two employers per world; news through your contacts.
- The living war: real fronts that move, sparks that flare into fights, worlds changing hands.
- Commander 'Mechs: any design can carry the Commander; special command 'Mechs unlock during a campaign; factory worlds and order desks at trade hubs.
- Salvage, step two: buy more salvage rights after the battle.
- Vehicles, round two: critical hits for vehicle crews, salvaging enemy vehicles, field mods built for vehicles, and the Commander riding into battle in one.
- The escort mission and a round of battle-rule fixes.